Mt Foraker Full Northeast Ridge
From May 27 to June 4, 2018, I attempted to climb Mt Foraker via its full northeast ridge (from Kahiltna Pass, over Mt Capps, Kahiltna Dome, the NW shoulder of Mt Crosson to the standard Sultana Ridge route). I went solo and tried to be on skis as much as possible.
Map of planned route
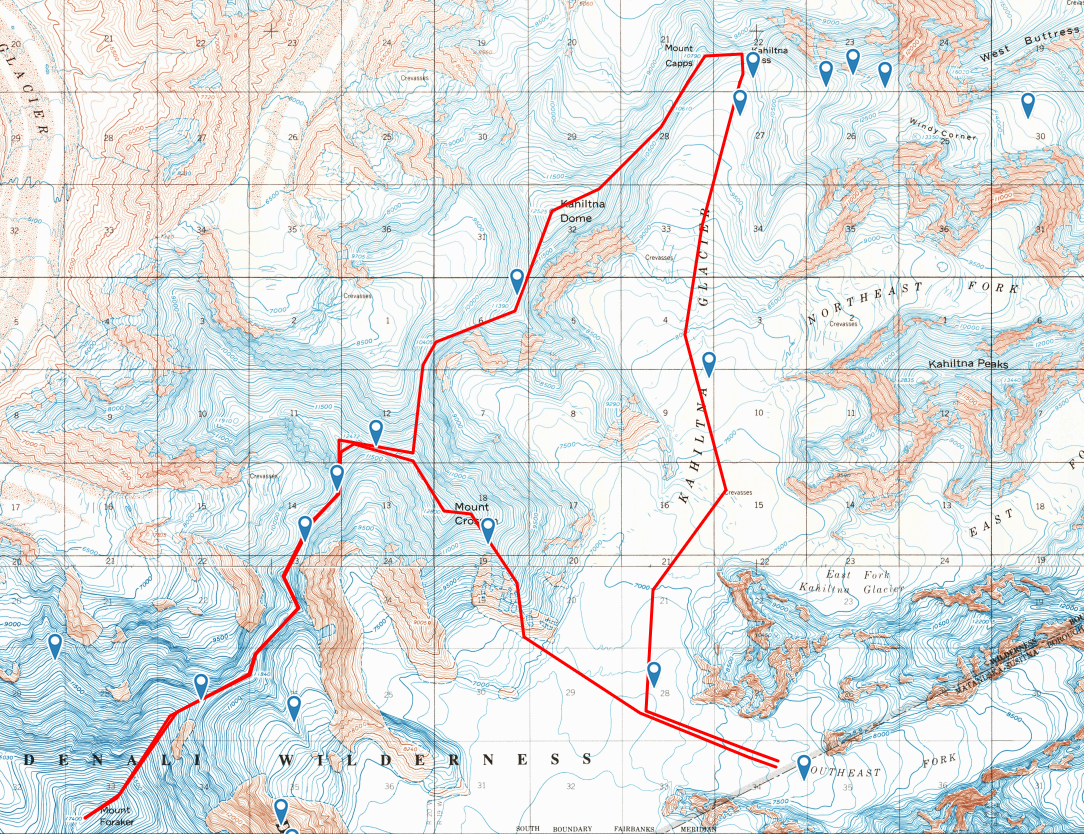
The route goes counterclockwise. I fly onto the airstrip at the lower right, then go north to Kahiltna Pass at the top, southwest all the way to Foraker, and then back northeast to Mt Crosson and southeast to return to the airstrip.
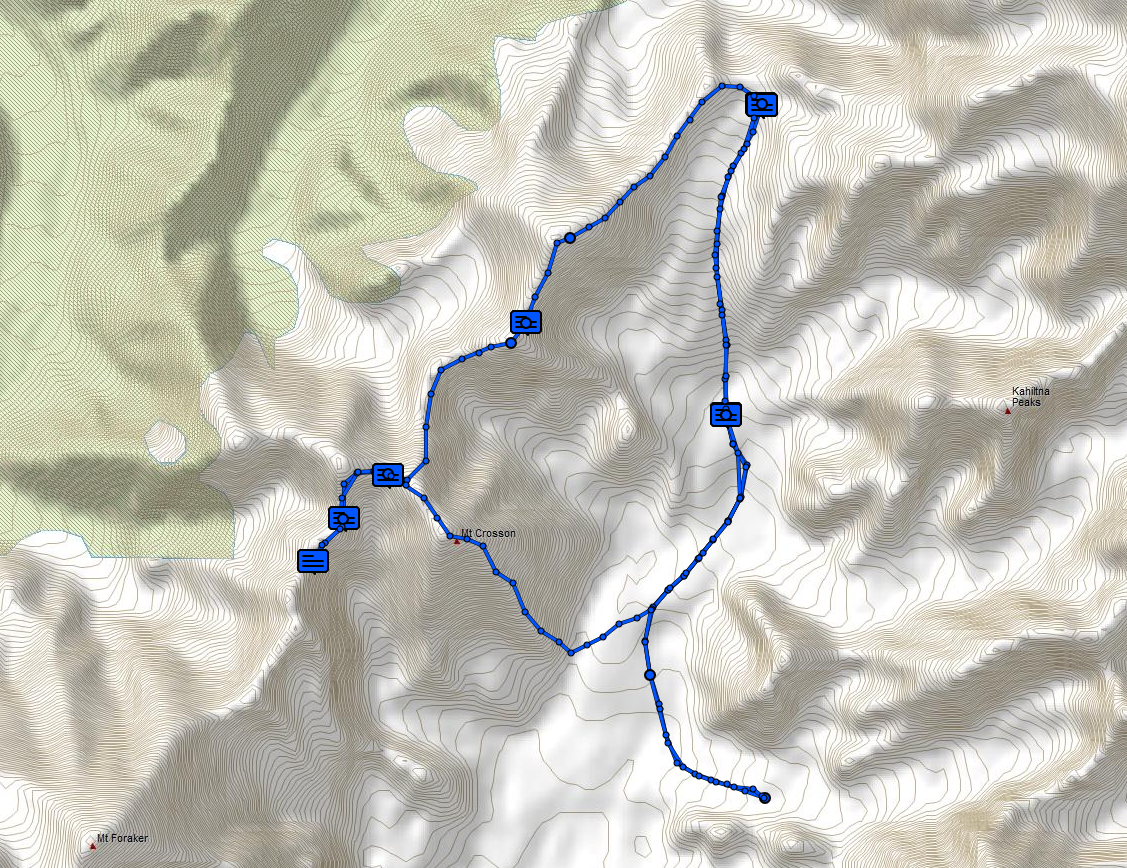
Map of what I actually did via InReach
Day 1 (Sunday, May 27): all my luggage arrived at the Anchorage airport and I waited for my Denali Overland Transportation shuttle driver, whose 630 AM absence made me nervous, but he was only 10 minutes late. We picked a team of 8 guided climbers up from a hotel, where I nicked a piece of bacon and a free coffee. The ride to Talkeetna was nice, sunny, and I soaked in the last conversations I’d have with other people in the van. In Talkeetna, we dropped off the group at K2 Aviation before going to the Denali Overland office to pick up the fuel I had them purchase for me. Then the driver dropped me off at Sheldon Air Service and I brought my gear to the hangar. I walked into town to try to have my orientation meeting earlier than scheduled, but it turned out I was meeting with the esteemed Mark Westman, and he wouldn’t be in til later. So I went and had a delicious breakfast at Latitude 62. The orientation meeting was short, as Mark knew I had heard the same info last year. He offered some advice for my route, and I rode the borrowed janky hangar bike back to Sheldon with two CMCs dangling from the handlebars. CMCs are Clean Mountain Cans; what you shit in on the mountain.
I was ready to fly out, but they had me on a plane with three Colombians who didn’t have their finances together and it took the better part of the afternoon for them to collect enough cash and credit to pay for their flight. It was a perfect day and I wished the remainder of my journey was this good. The flight onto the glacier was superb, I was able to scope out the Sultana ridge before we turned east and landed.
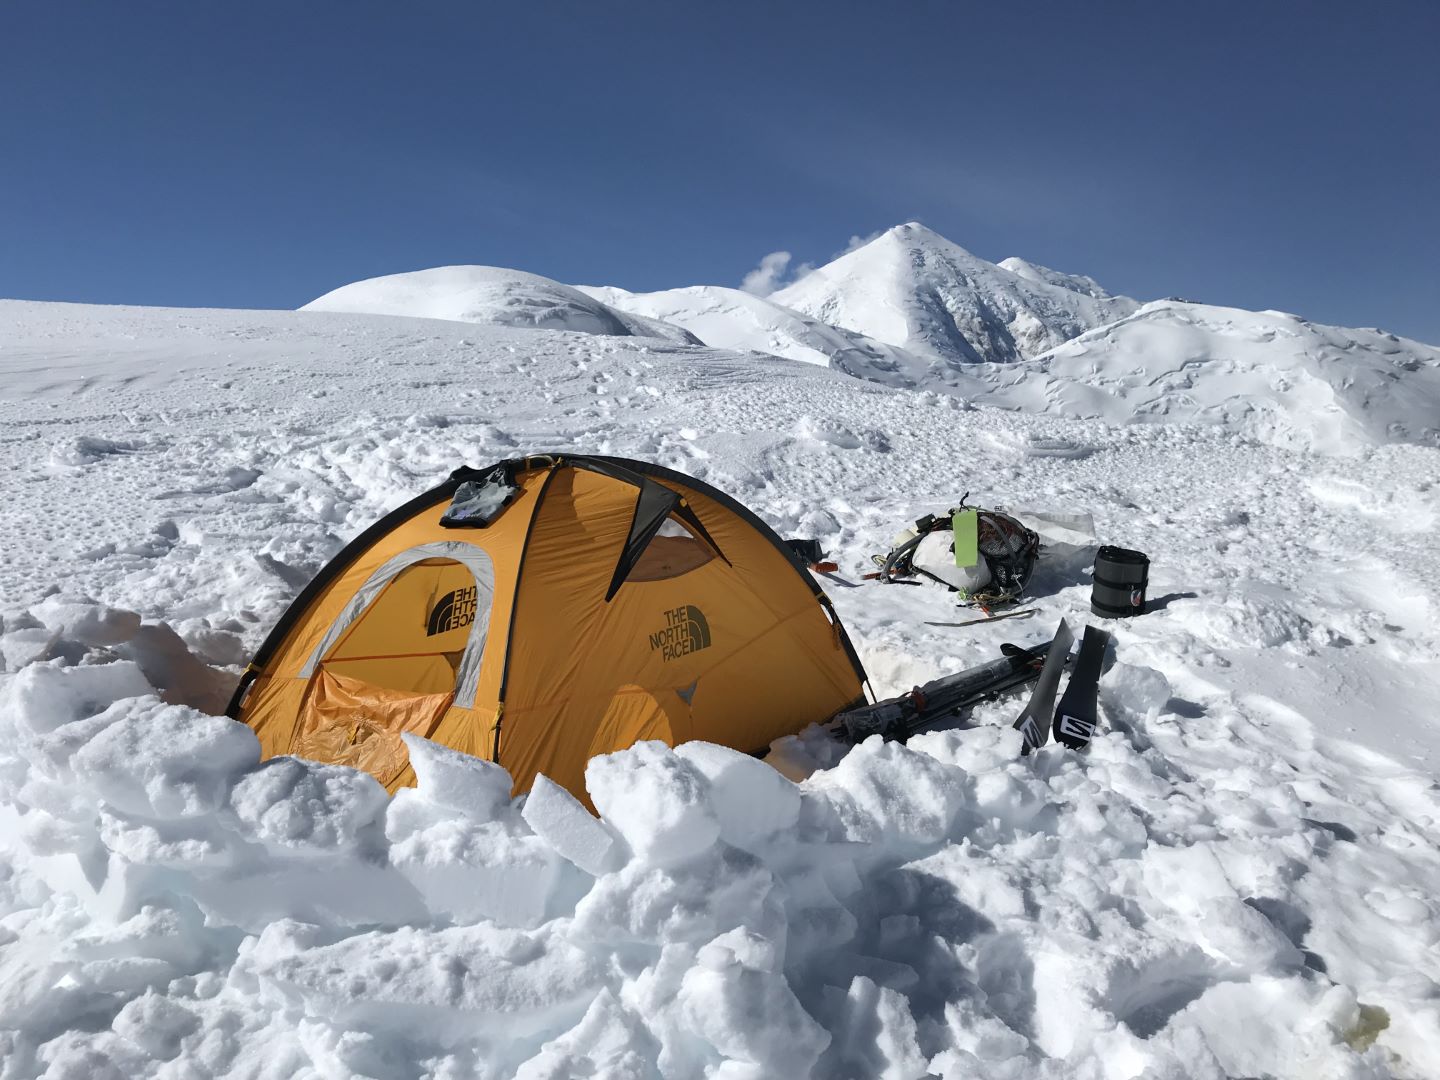
Unloading the plane was quick and in no time I had my duffel strapped to my sled and connected to my backpack. I got started just before 7 pm. I should have taken off my skins and skied down Heartbreak Hill, but even with skins it went quick. The sled stayed behaved for most of it. After about two miles I looked back and realized I should cache one of the CMCs. Why carry two?! So I dug a meter deep hole and buried the big one. After 5 miles, I rolled into camp 1 (7600 ft at the bottom of Ski Hill) hungry and tired. It had been a long day! I set up the tent, fired up the stove, melted snow to a boil, devoured a freeze dried meal, and passed out.
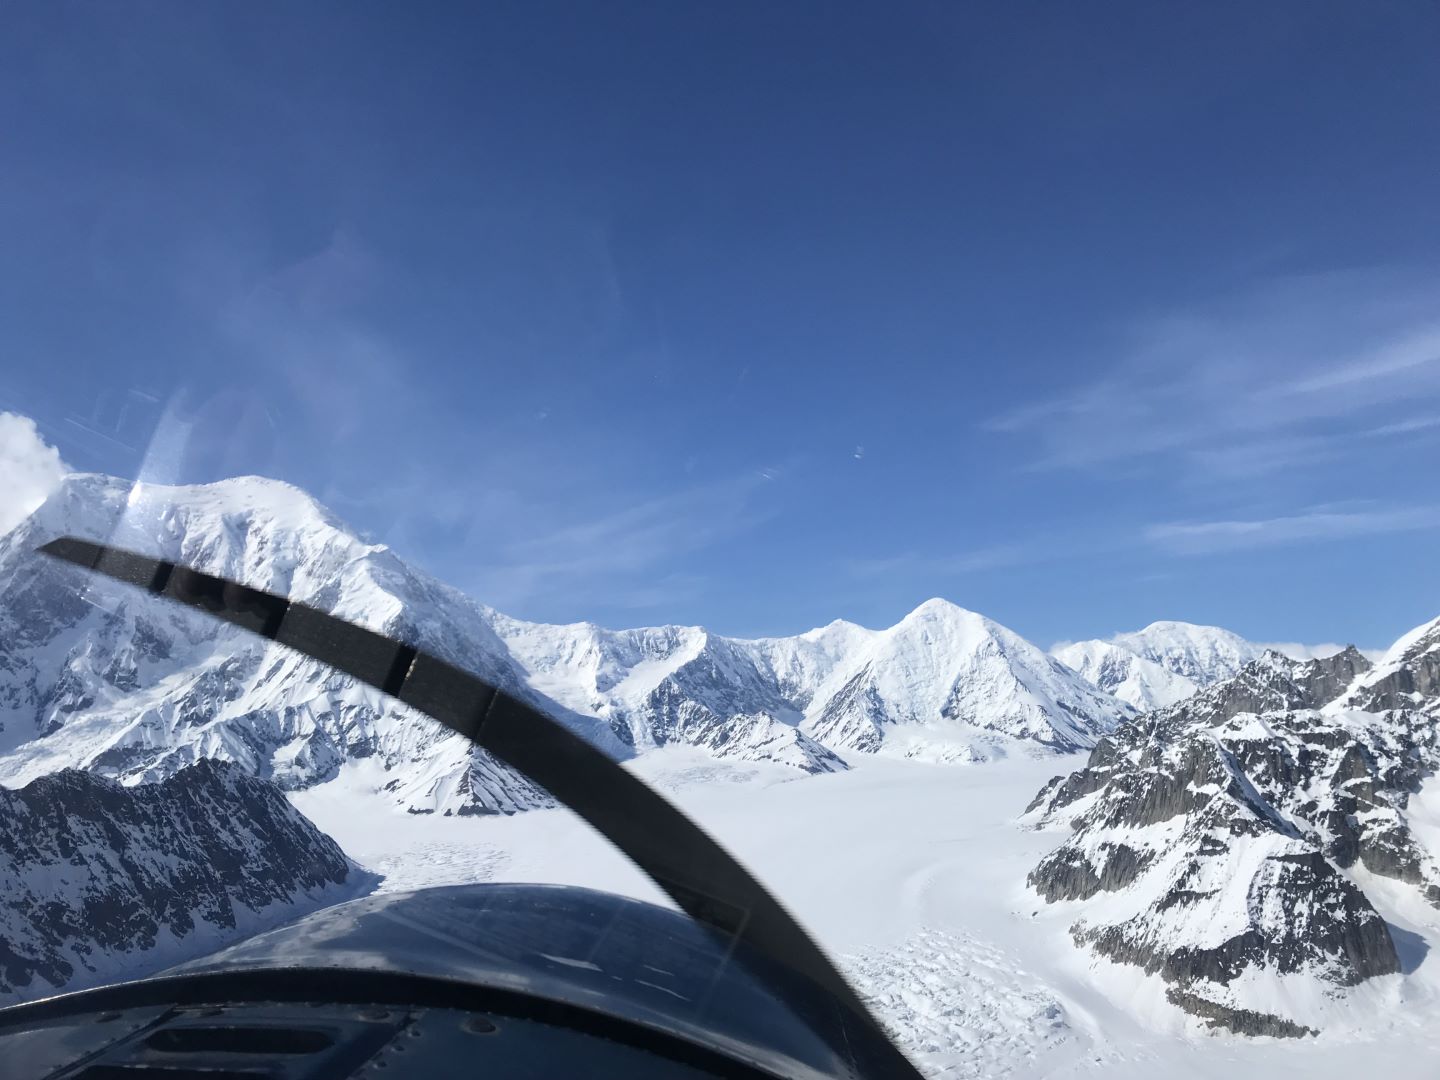
Foraker, 12472, Crosson, and Kahiltna Dome on the skyline seen from the flight in
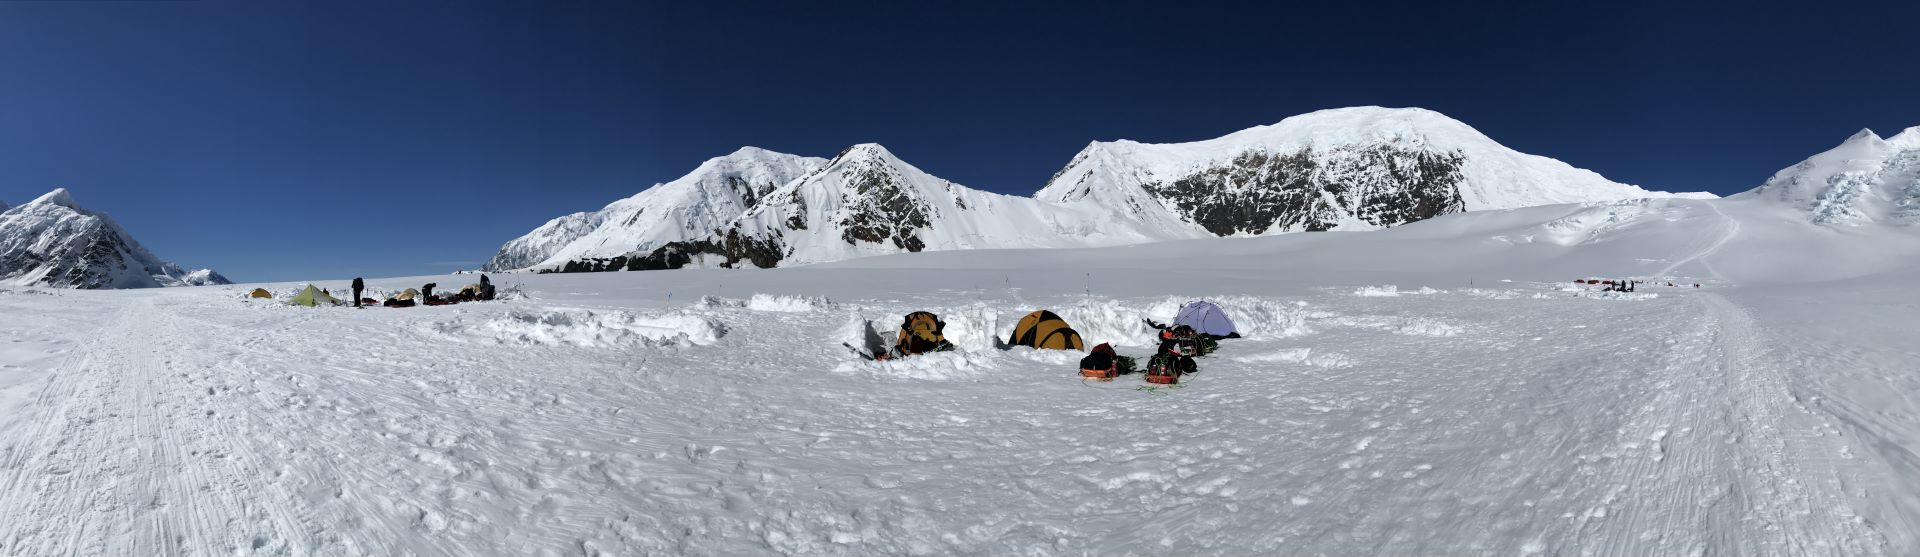
Mount Hunter and some airstrip tents
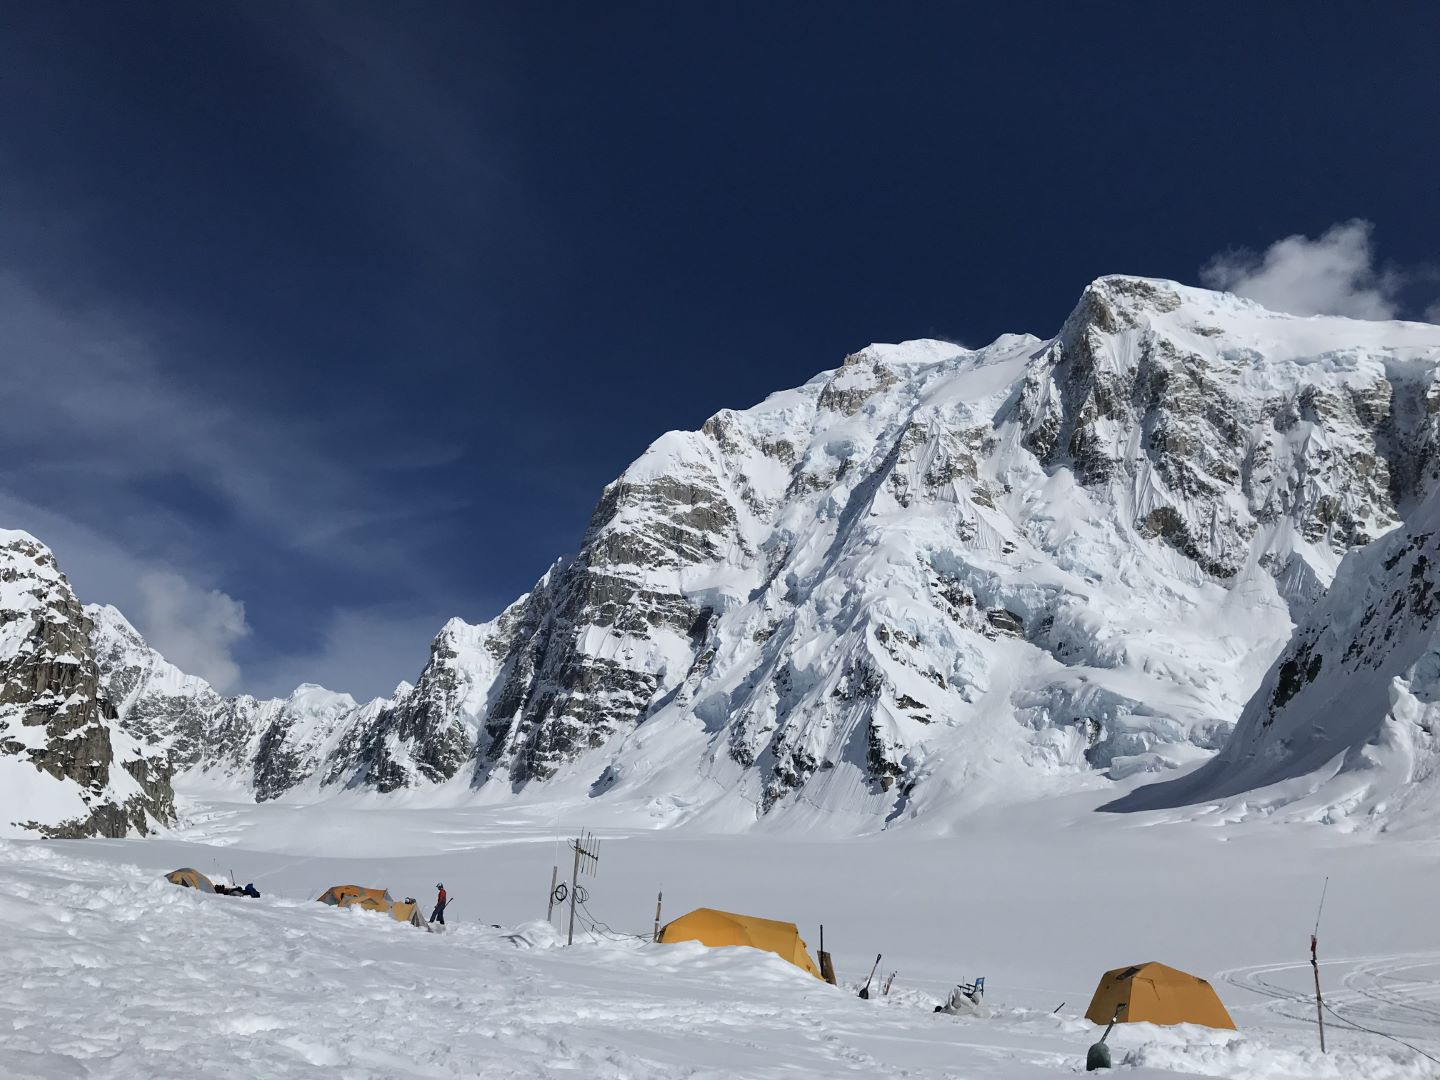
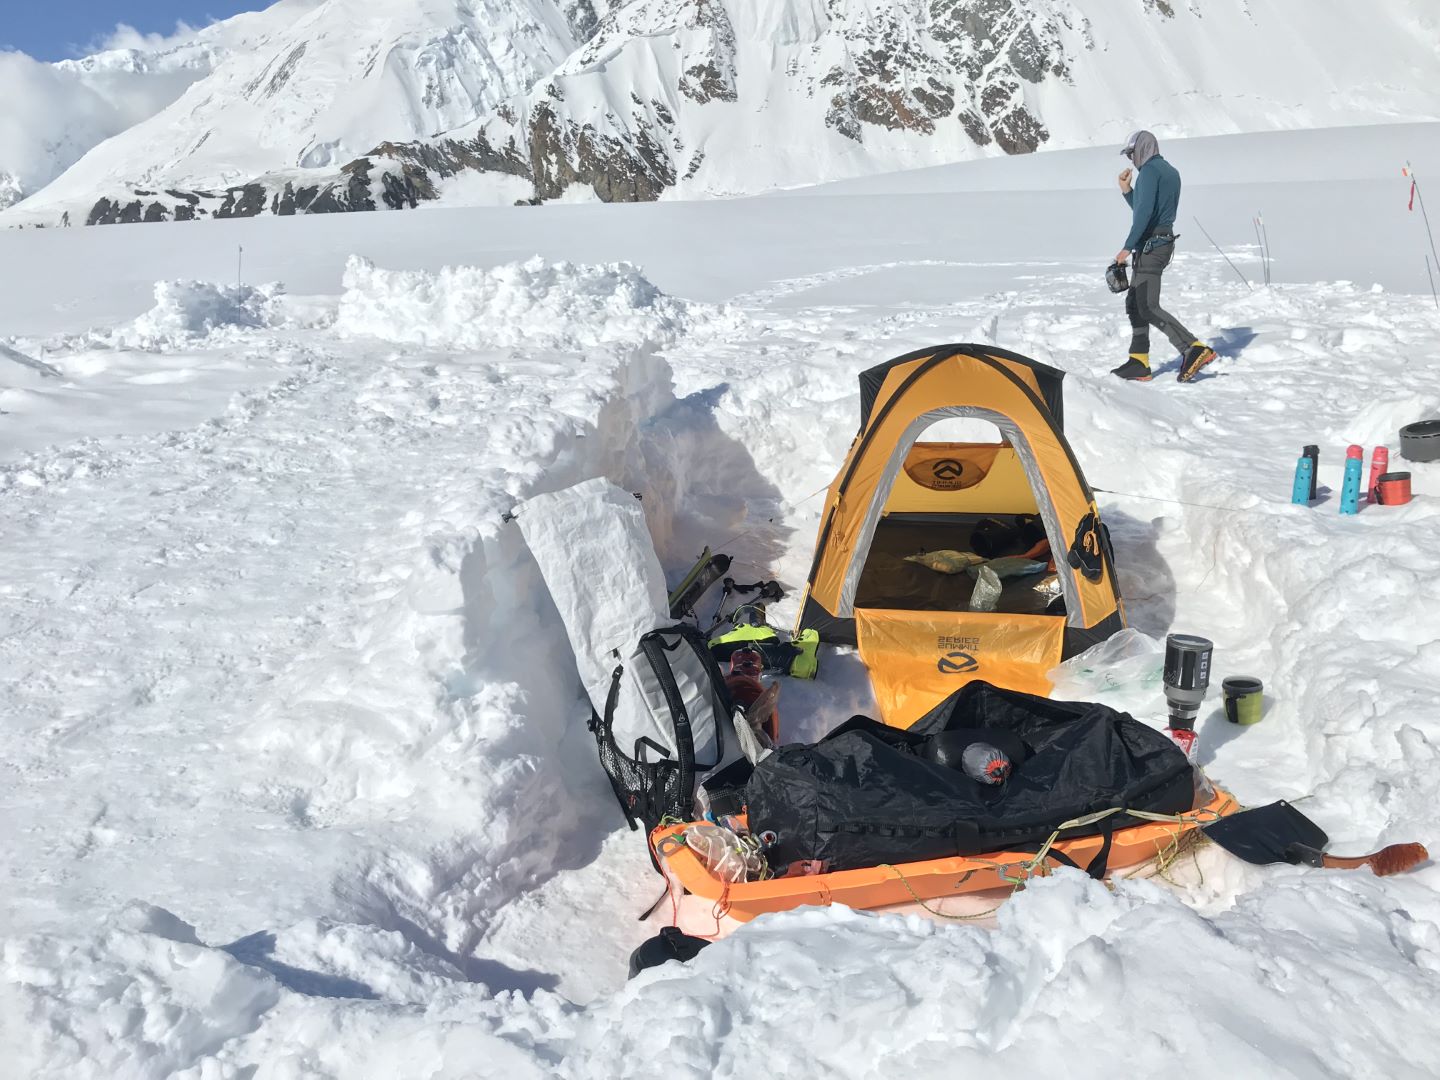
Camp 1, climber brushing teeth on his way to the bathroom area
Day 2 (Monday, May 28): I slept in and stayed in my sleeping bag until the warmth of the sun hit the tent. A fresh avocado and freeze dried banana strawberry smoothie was for breakfast, along with a conversation with three skiers from Seattle who showed up to camp not long after me. It was warm and late when I departed, and I was nervous that all those who left before me would snag the good campsites. My worry was unfounded, as most of these were guided teams making a cache carry and were returning to camp 1. I pushed myself a bit too hard making good time to camp 2, though I tried to stay hydrated in the heat of the day. I stopped halfway to tape up blisters and have a big snack of crackers and water. There was a palace of a campsite available for me and I promptly set up the tent and started making water. It was here that I realized I forgot my charging cable for my GPS watch. Damnit! Though it is a luxury item and not a necessity. I wanted a detailed track of my entire journey, something I didn’t do last year on Denali. The Seattle team had started shortly behind me and they were going to make the push all the way to 11000 ft camp, so I asked if I could borrow a charging cable and skinned up halfway with them before my watch was fully charged. The powder turns back down to camp were fantastic. The 8 pm weather report unhelpfully said nothing new. I had a freeze dried dinner and hit the sack.
Looking north up Ski Hill from camp 1
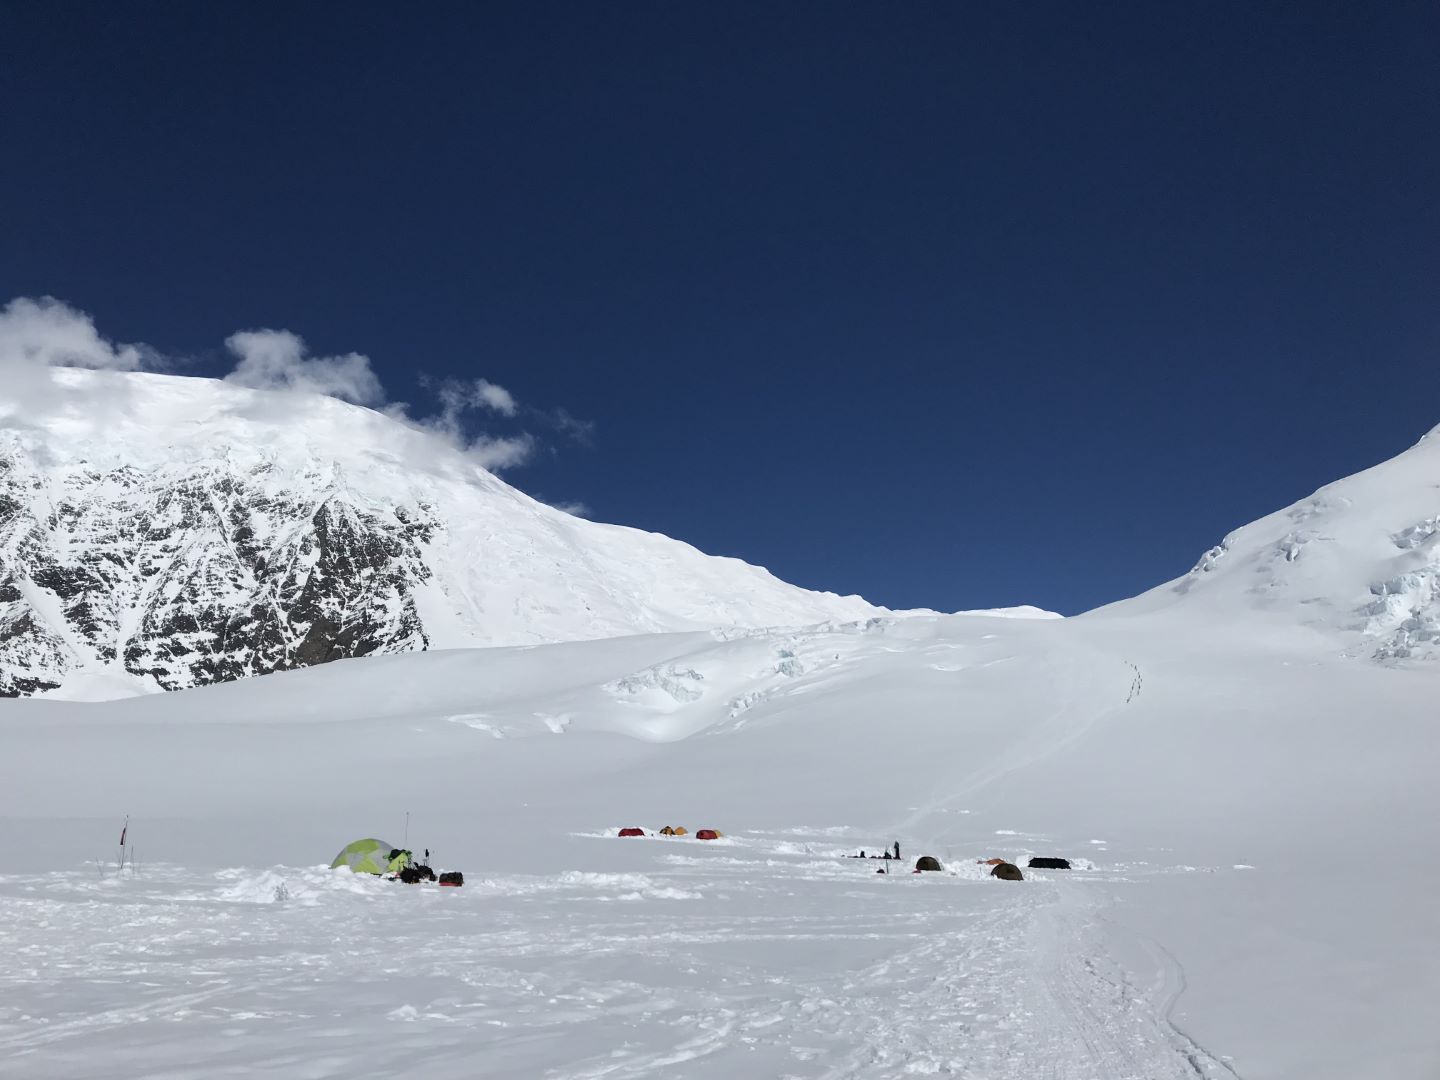
Looking east down at camp 2 from Kahiltna Pass. Going up from center is the normal West Buttress trail. My ski tracks lead from camp to the lower left corner. Also visible center-right is the new weather antenna
Looking west up at Mt Capps from Kahiltna Pass, Kahiltna Dome on left
Day 3 (Tuesday, May 29): As expected, the low pressure system arrived overnight and the day was continuously lightly windy and snowy. Dehydrated, I sipped water and read Paul Pritchard’s book Deep Play on my Kindle between naps. My second mistake came to light as well: I didn’t update the firmware on my InReach, so I don’t have the weather forecast feature. Shit. I’ll have to rely on the NPS forecast, which said more snow tomorrow, then higher pressure arriving Wednesday and Thursday.
Day 4 (Wednesday, May 30): Wind and snow picked up a little overnight. A steady breeze drives the snow into the right side of my tent, then it flies over and accumulates on the left, lee side. Flakes blow into the tent as I make water. I finished Pritchard’s book and started Denali’s Howl. The sun made brief appearances throughout the day but the wind remained steady blowing snow from SSW. 8 pm report said the low is forecast to die out in next couple days and high pressure will build over the weekend. Looking up the West Buttress route, I could see clouds clearing up high, but my route remained obscured. It would also be wise to let this new wind blown snow settle before starting.
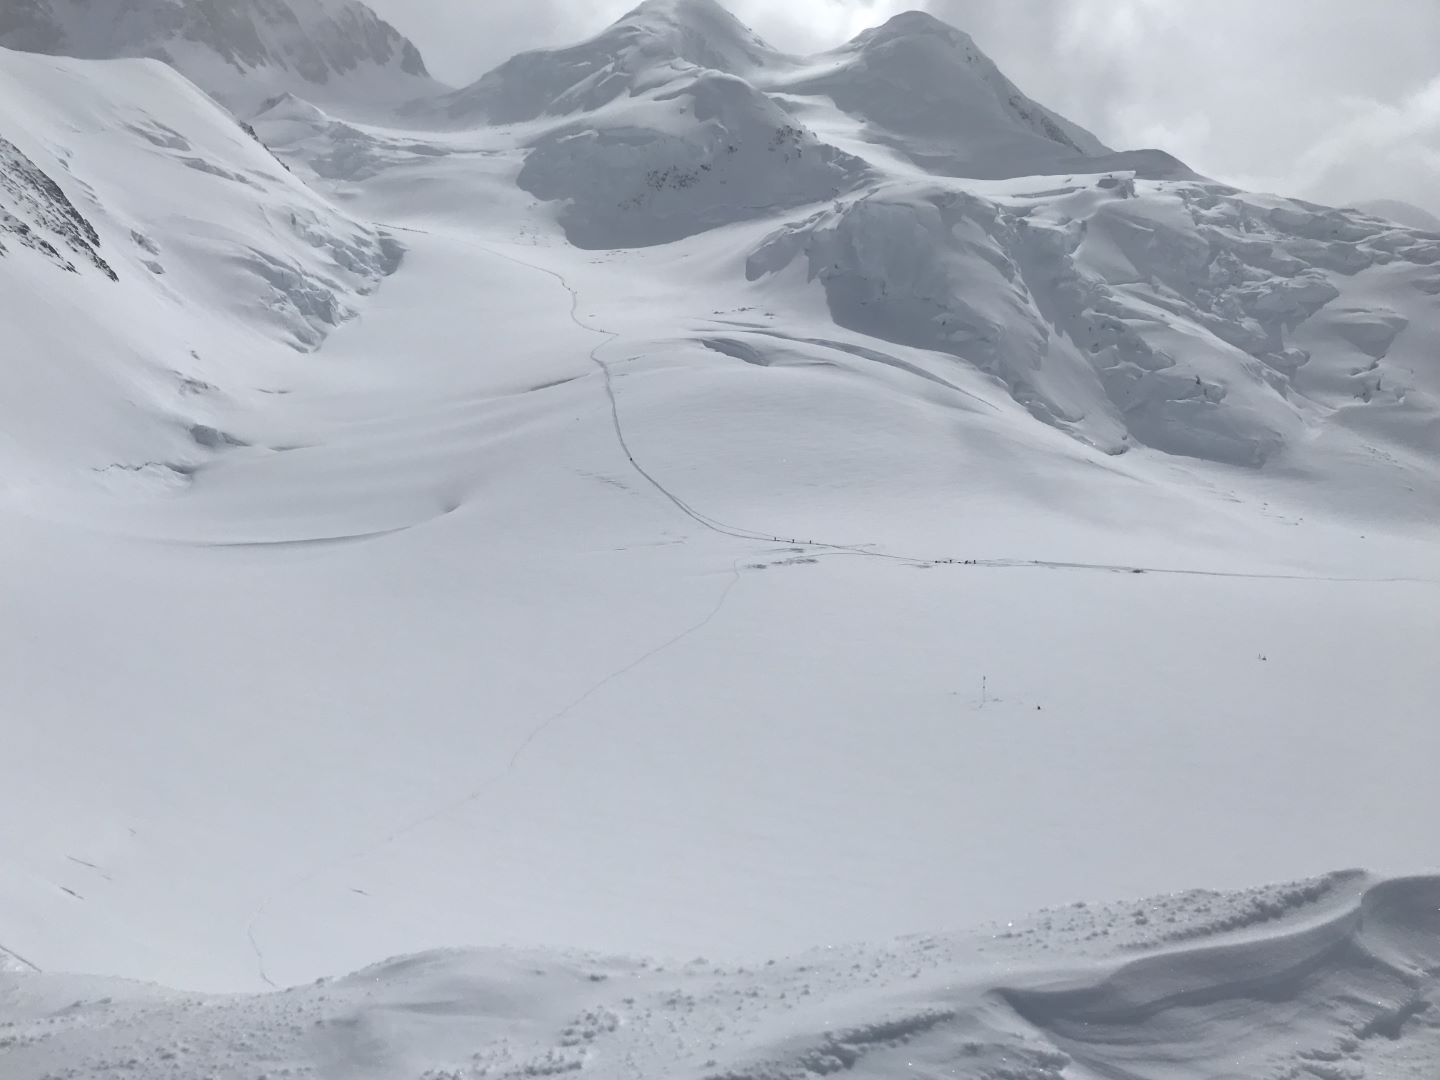
Looking down at Kahiltna Pass and the West Buttress trail
Looking west from Mt Capps to the top of the Peters Glacier
Day 5 (Thursday, May 31): I didn’t sleep in because I knew getting ready and packing would take a while. I decided to cache my duffel, with some food, fuel, camera, batteries, a pair of gloves, a solar charger and some other odds and ends. I was originally going to pull a sled through the whole route, but after Mark Westman asked where I was caching things and how much fuel and food I was bringing on the route, I realized I’d need to ditch the sled and just use a backpack. I was nervous about the size of my pack, it’s a bit smaller than the one I used last year and I had it completely stuffed, with all sorts of gear hanging off the outside too. It took two arms and a big grunt to get it on my back. It weighs over 50 lbs. And it’s not going to get much lighter, as food and fuel are consumed slowly and don’t comprise much of the total weight. An existing cache hole was at camp, I just had to dig out the fresh snow and extend it a bit to fit the sled.
Finally, at noon, I got started. It was warm on the glacier, but as I ascended Kahiltna Pass the breeze picked up. The first obstacle was getting over the bergschrund, but with the wind packed snow over the past two days, it looked bomber, so I quickly skinned over it. A few minutes later I gained the ridgeline, which steepened as Mt Capps came closer. I had to stop a couple times to put on ski crampons, then remove skis and use actual crampons. And go around some easy crevasses. The summit is just a big dome, underwhelming.
The ski down the southwest ridge was short and easy, then I reapplied skins and made my way up Kahiltna Dome. This was a bit more challenging ascent. Again, I stared with skins on the lower, easier slopes but soon had to put ski crampons on due to the hard, wind packed snow. The crevasses were bigger and at one point about a third the way up, I had to switch to crampons and climb up an arch of snow over a big (but not deep) crevasse, then haul my bag up with the rope I brought. There was a good 1000 ft of cramponing - the slope too steep for skinning, but around 12000 ft it eases off and I returned to skinning. A few false summits and then I was at the top of the dome, much like Capps, only bigger. A featureless, flat snowcap. Anticlimactic for how nasty the ridge conditions were on the way up.
Skiing down was frightening: a very steep slope, variable snow conditions, and a heavy pack. I went slowly and cautiously, mostly snowplowing or side slipping down. There were less crevasses on the south ridge. While at the summit and again at the bottom of my descent, I eyed the next big ridge on the route. It’s steep, heavily crevassed, and intimidating. Perhaps it won’t be so bad when I get up close to it.
I camped at the saddle of K Dome and Peak 11390. Making dinner, I spilled a few ounces of my Thai curry all over the tent floor and a handful of other things. Everything is going to smell like curry for the rest of this adventure! Luckily it’ll all freeze and be easily scraped off.
Weird bridge over a gaping crevasse that I had to climb
Looking north to see what I’ve covered so far. Kahiltna Pass at center, Mt Capps on left
Looking south to the summit of 12525 ft Kahiltna Dome
My tracks coming down the steep south face of Kahiltna Dome
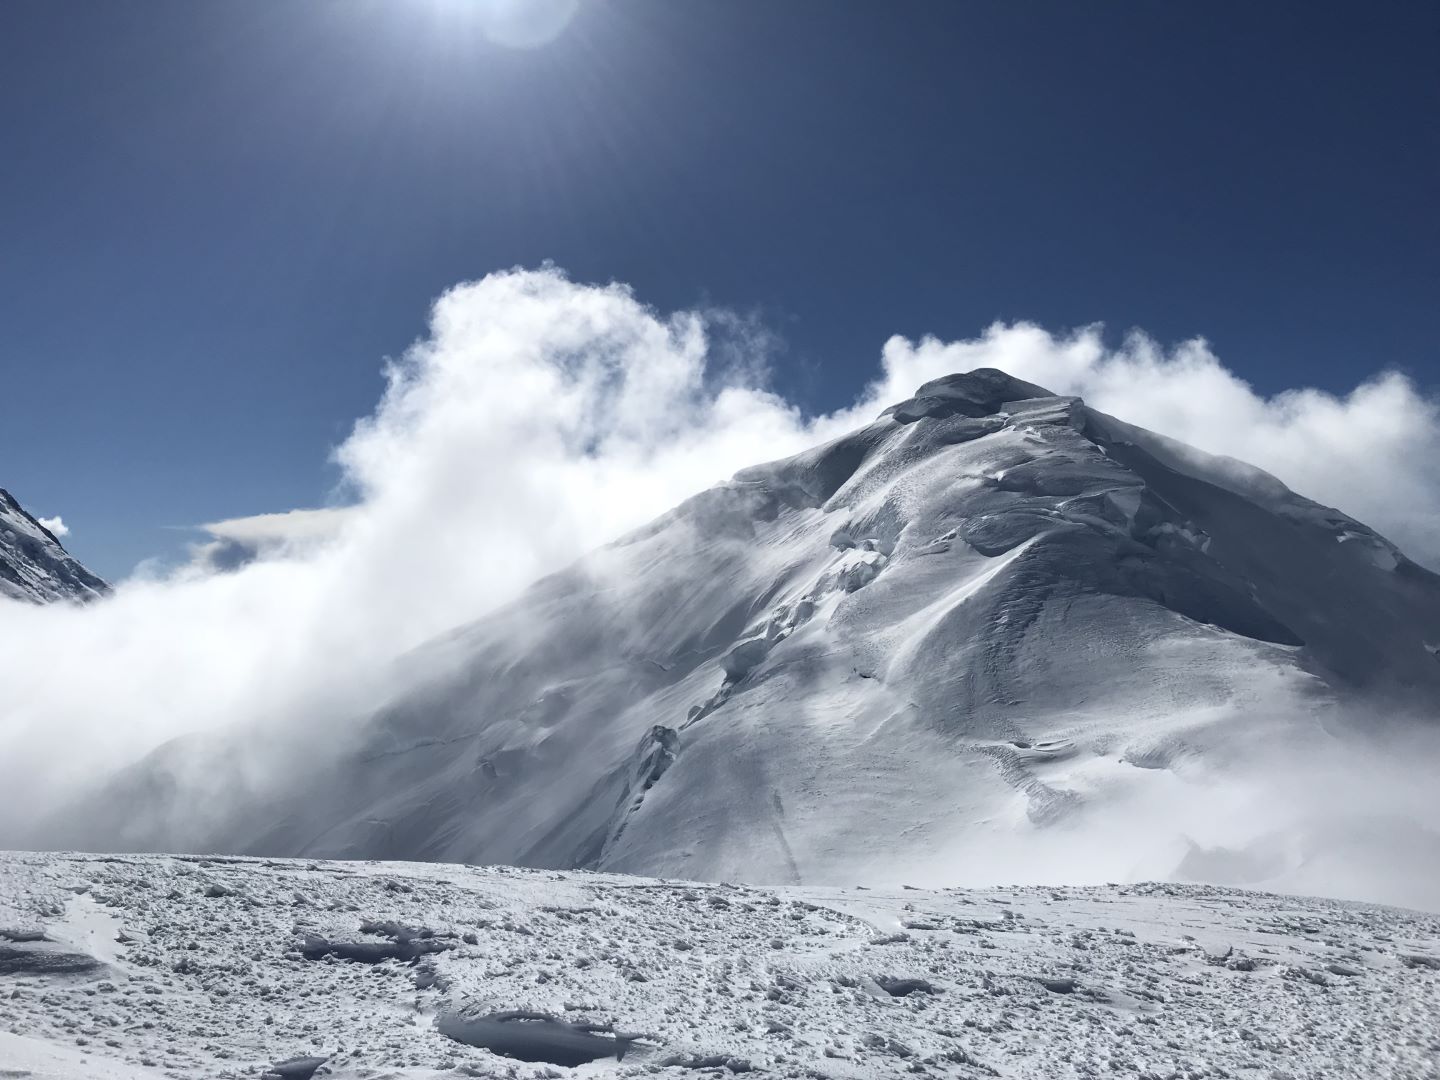
View south from Kahiltna Dome toward Crosson and Foraker
Camp near the south ridge of Kahiltna Dome, looking toward Crosson and Foraker
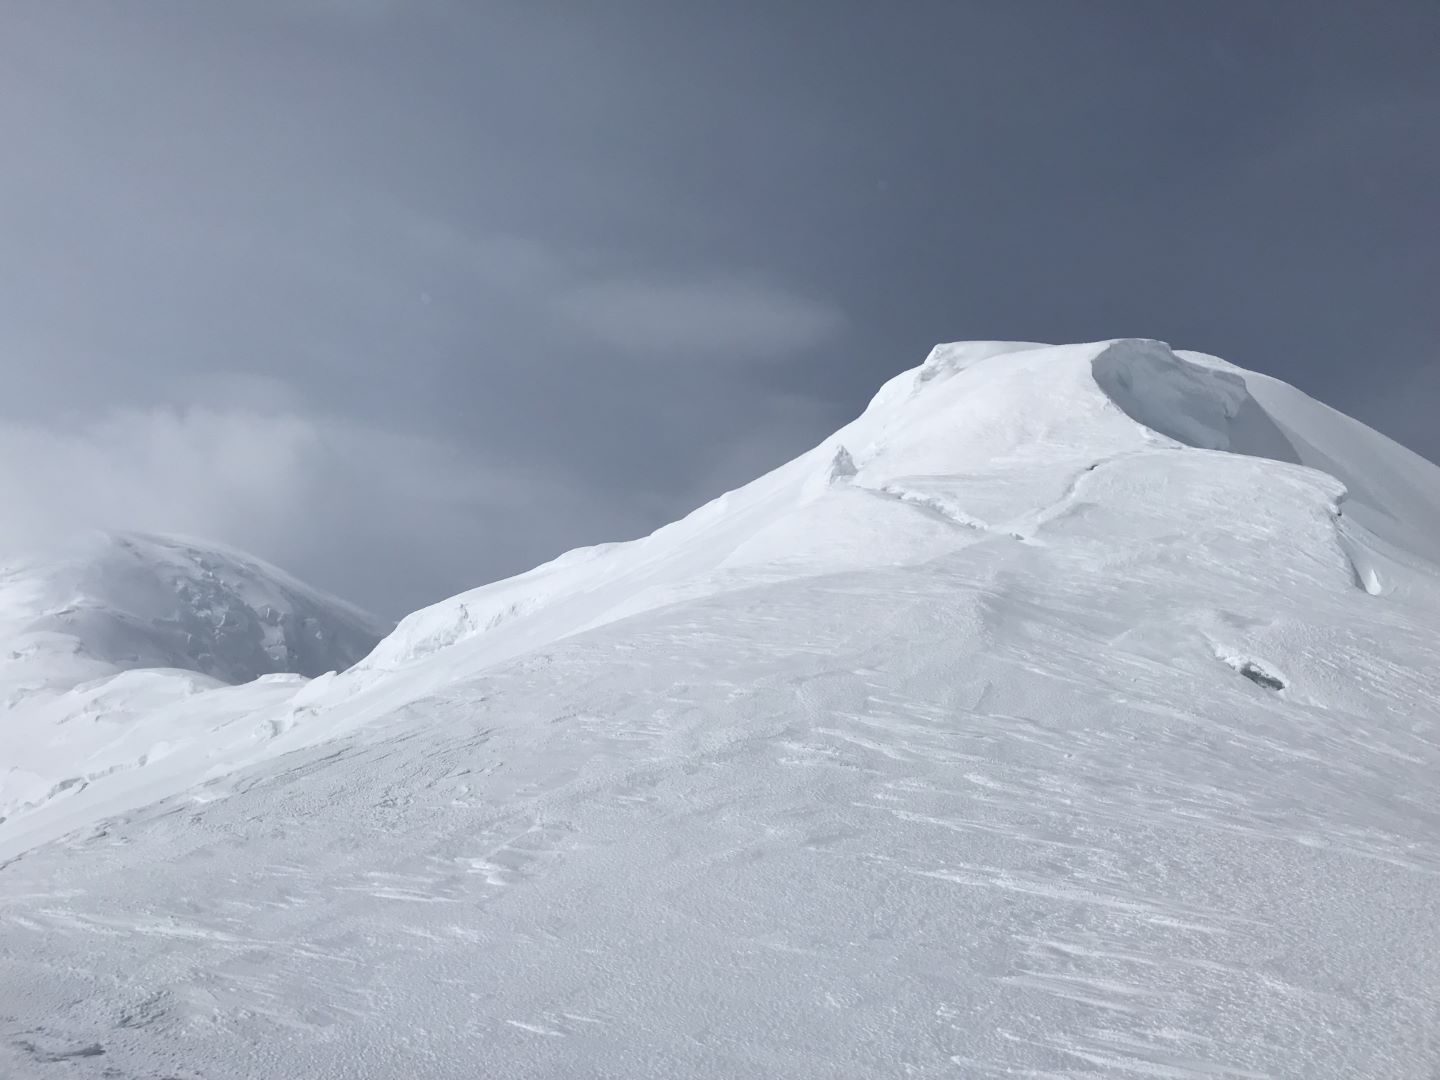
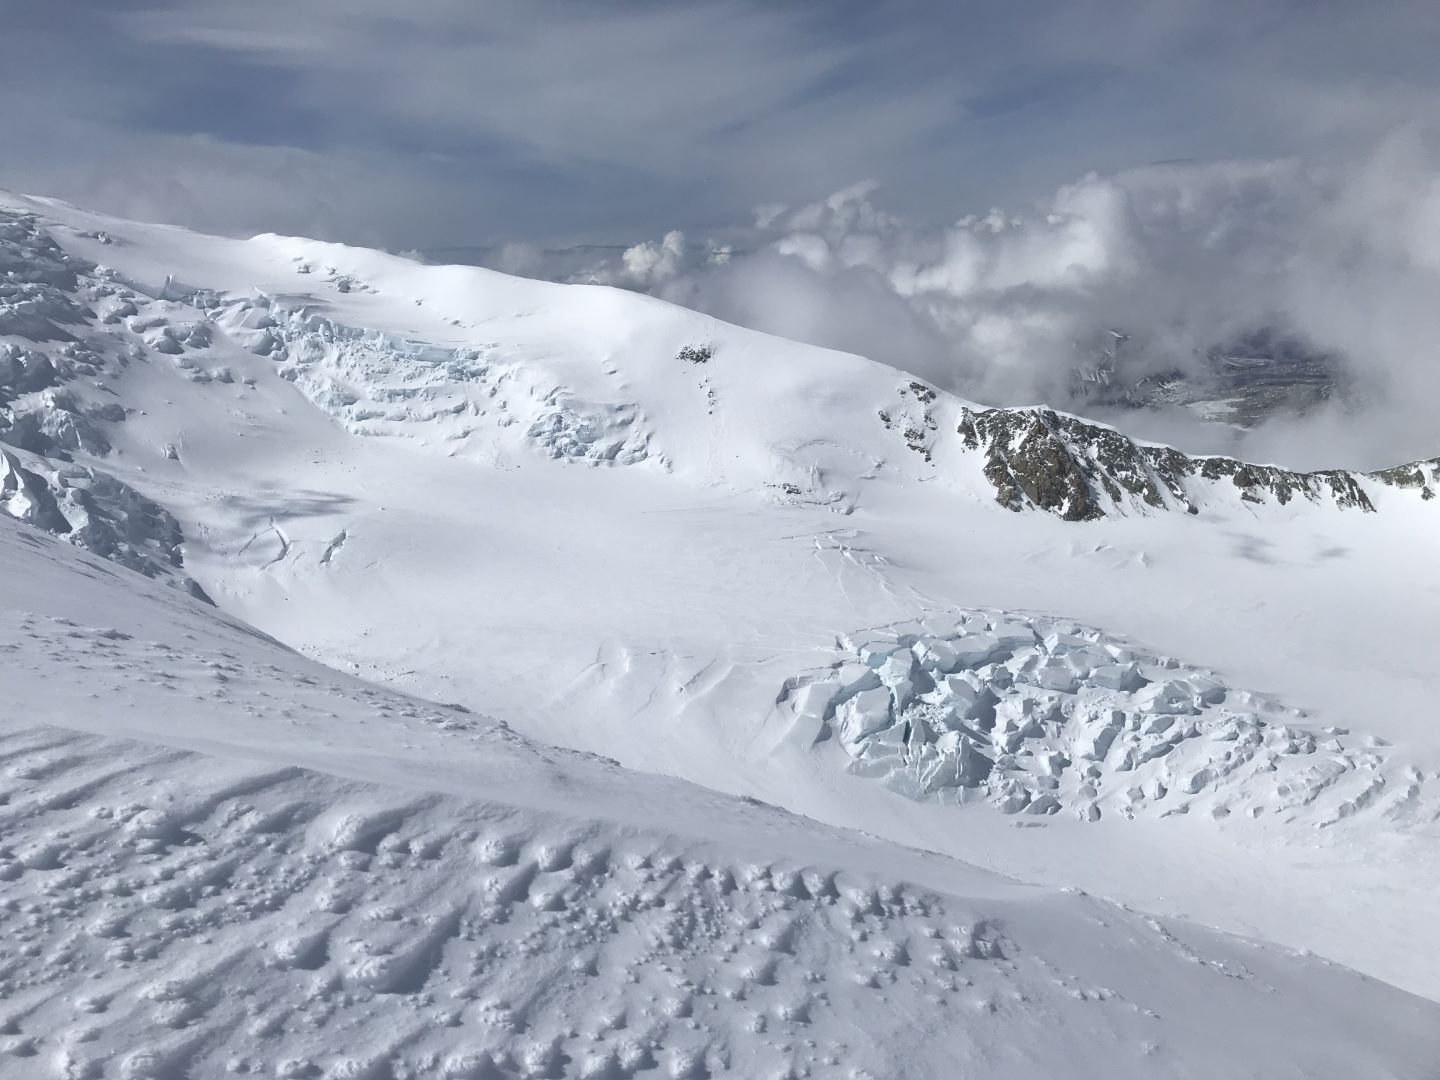
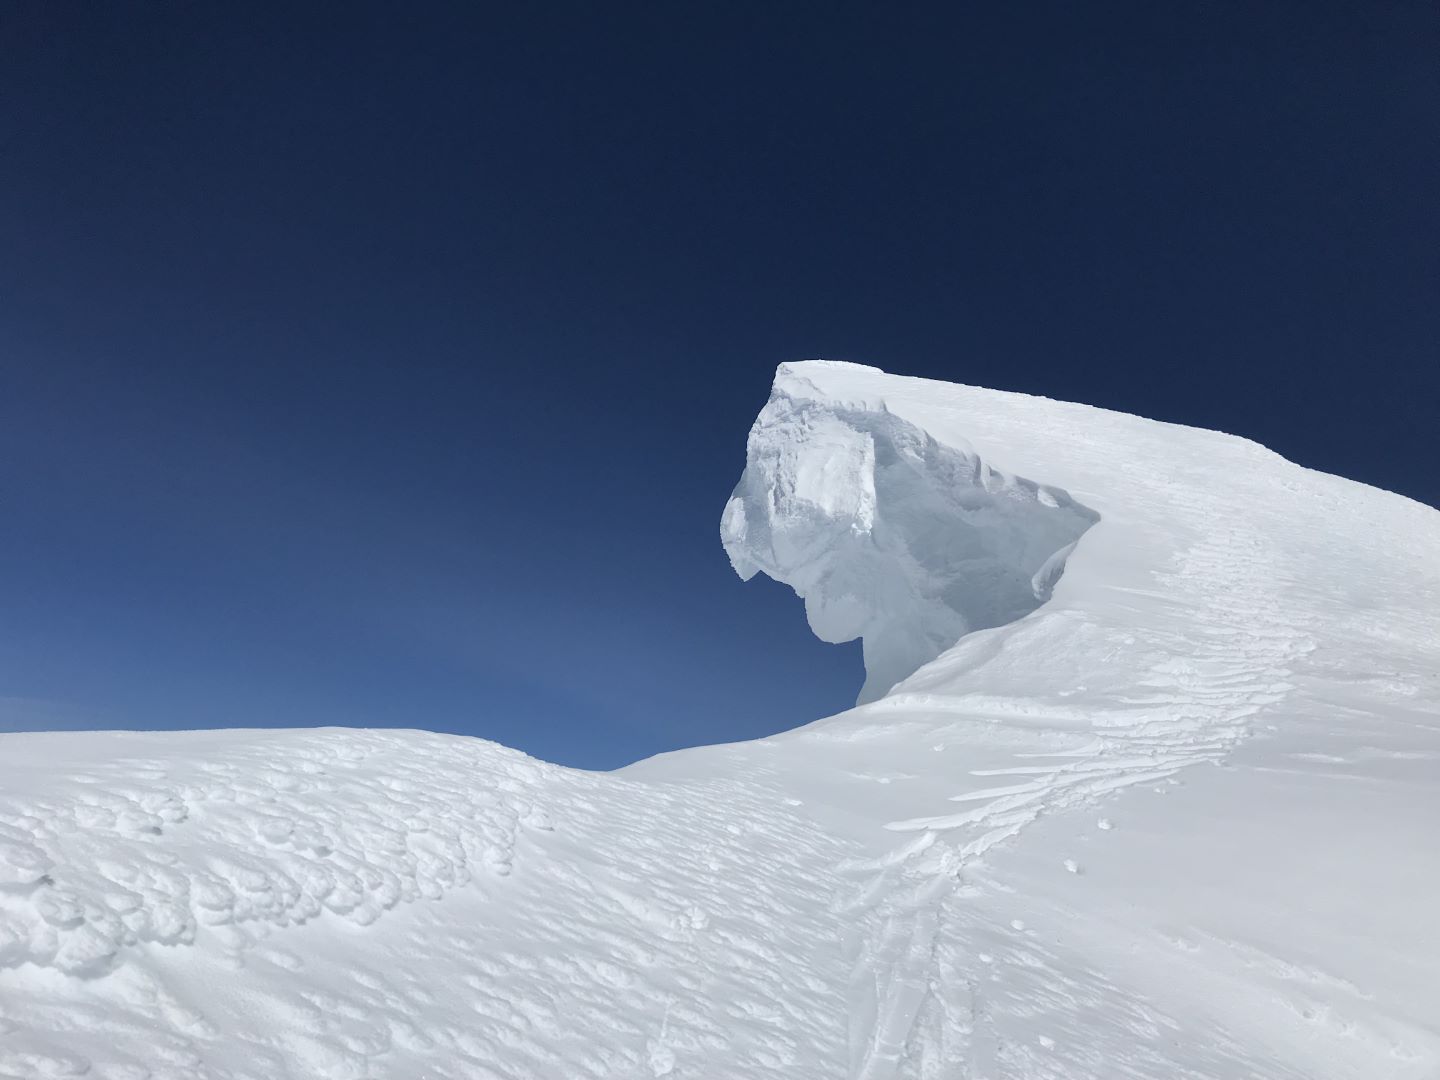
Day 6 (Friday, June 1): I had another lazy morning; I didn’t feel like doing much until the sun hit the tent and warmed me. The first bit of my route took me up a small hill with some huge snow/ice mushrooms at the top. I went around and skied over a thousand feet down to the low point of the day, just above 10000 ft. Route finding was a bit tricky, massive cornices hung off my left side and the right plunged down into crevasses and ice falls.
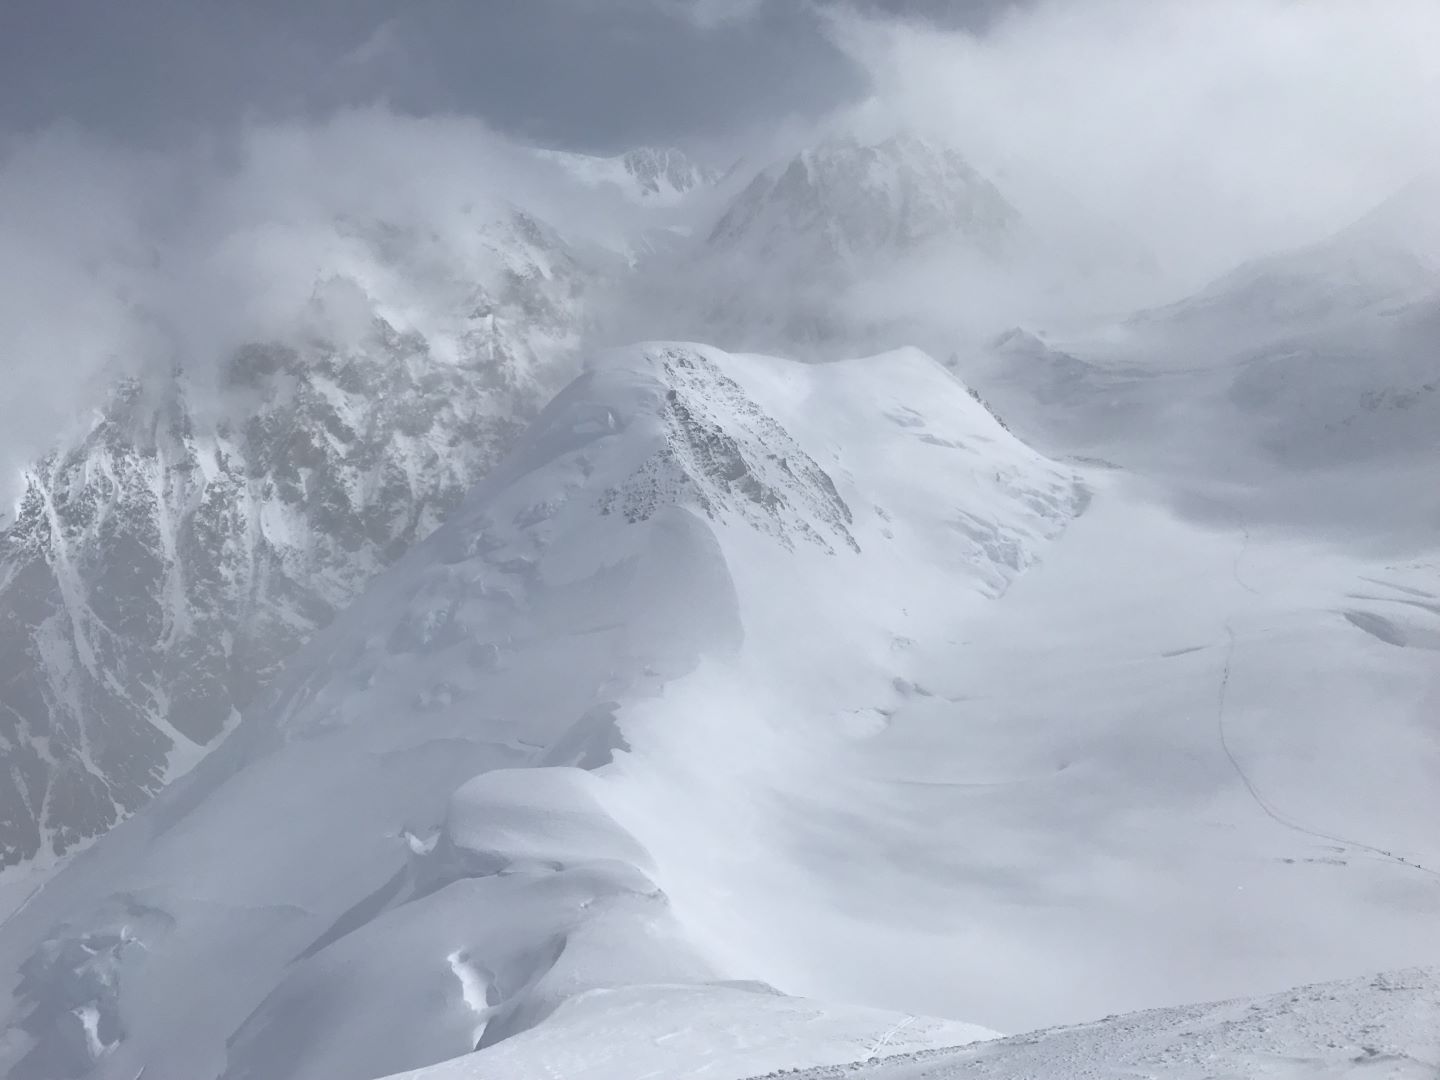
The next hill (Peak 10405) was broad and easy to get over, as were the flats leading to the intimidating steep North ridge of Mt Crosson. I took a couple photos to help me with route finding, and planned my route using the drawing tool in the iPhone photos app. I switched to crampons and not too shortly thereafter did I exchange poles for ice tools. The ascent went smoother than I thought. I wasn’t scared, snow conditions were great, either ankle-deep crust or firm neve/alpine ice. I was able to shorten the vertical gain by cutting over to the saddle between me and Peak 12472.
It had been clear all day, but now clouds from the west were rolling in and I had to wait for them to pass over every few minutes to plan my route across the saddle and up Pk 12472. I again took a photo and found a way up it to avoid its gnarled summit. The south ridge of 12472 was very sharp and steep, I was glad not to be on skis. Being in the clouds made navigation challenging and scary. I crossed small crevasses and made my way around big knobs of cauliflower snow.
I made camp once the ridge flattened out around 11200 ft. After an exhausting 8 hour day, I still had to dig a tent platform. I tried to find a somewhat protected area from the wind, but it still bends around hills. I didn’t build a very level pad into the side of the ridge - hunger, cold, and dehydration were motivating me into the tent. I got the tent set up and threw what was needed inside so it wouldn’t blow away while I staked it out.
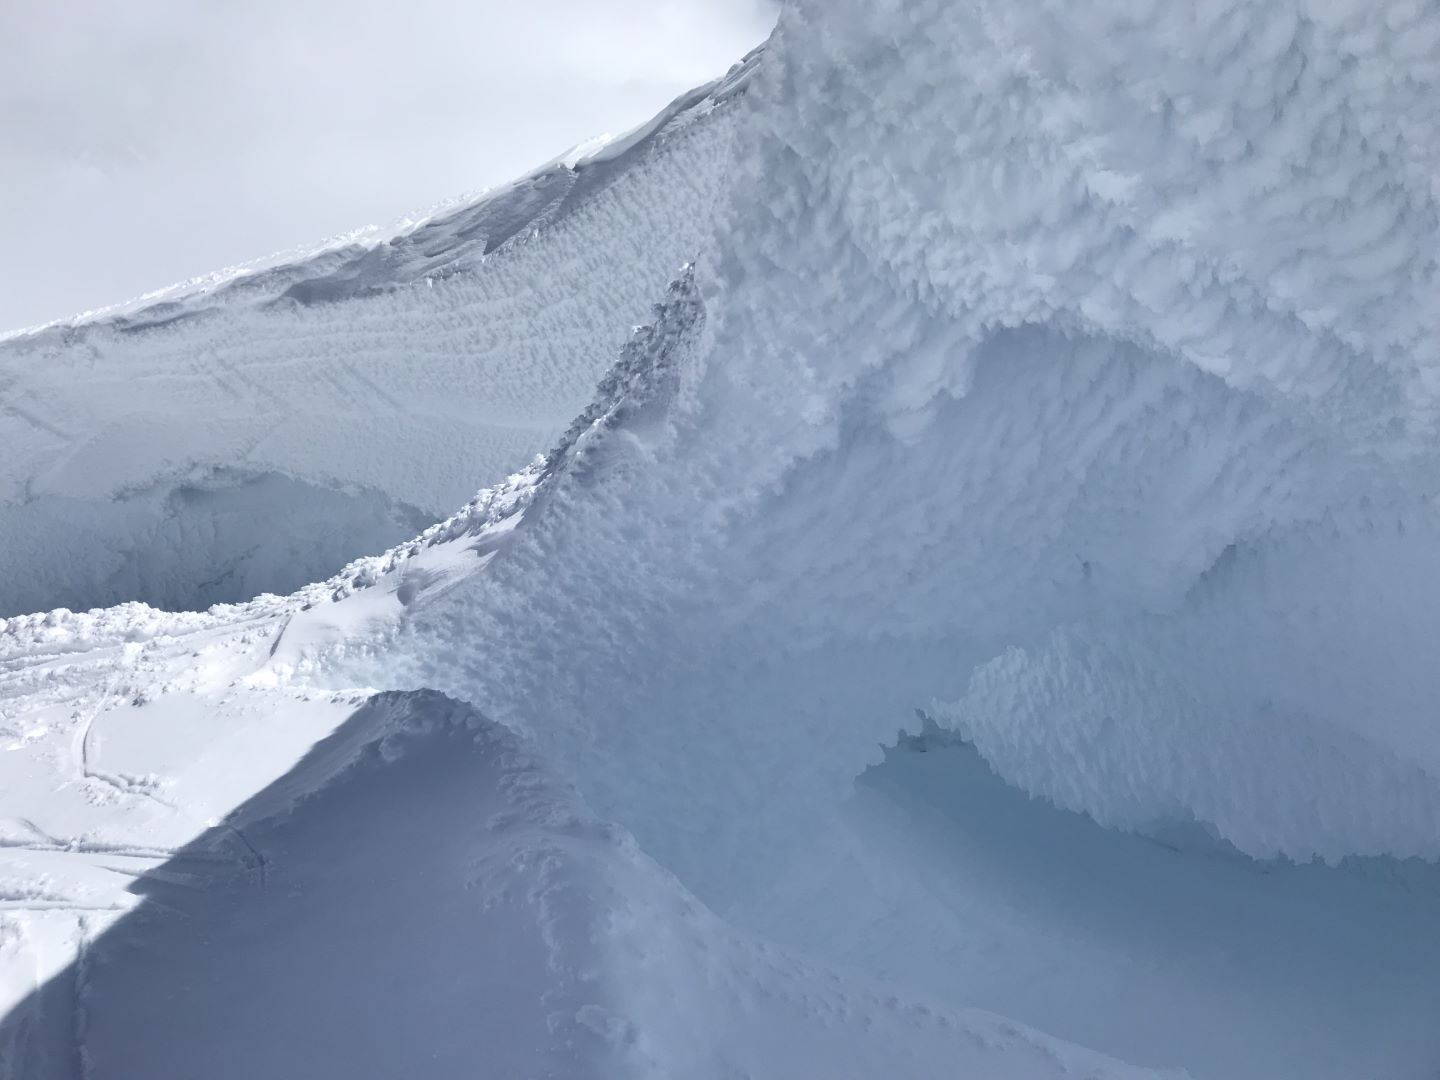
And then I found myself falling face first into darkness, but not quite free falling. Every time that feeling started, I must’ve hit a snow bridge, maybe three of them on the way down. I found myself 30 feet down a crevasse just wider than my shoulders. I wasn’t hurt at all. But how do I get out?! None of my gear is on me.
In my left hand I was still grasping the tent stakes. I carefully stood up, trying to press between the crevasse walls, with one foot gingerly weighting the snow bridge that caught me. I didn’t want to place all my weight on it and take a further drop into the darkness below. Using two stakes, I started chopping at the wall, making hand and foot holds. I kicked my boot toe into each and stood up, my back pressed against the wall behind me, “chimneying” my way up. I felt very innovative, and very lucky to have those stakes in my hand. And not be hurt, of course. The crevasse was two feet in front of my tent entrance. I feel like an idiot for not probing the area for crevasses, which is standard practice. But I was so ready to be getting warm in my tent that I neglected this very important task. The remainder of the evening went smoothly; I made water and dinner, put wet items and things needing to stay warm in the sleeping bag, and went to sleep.
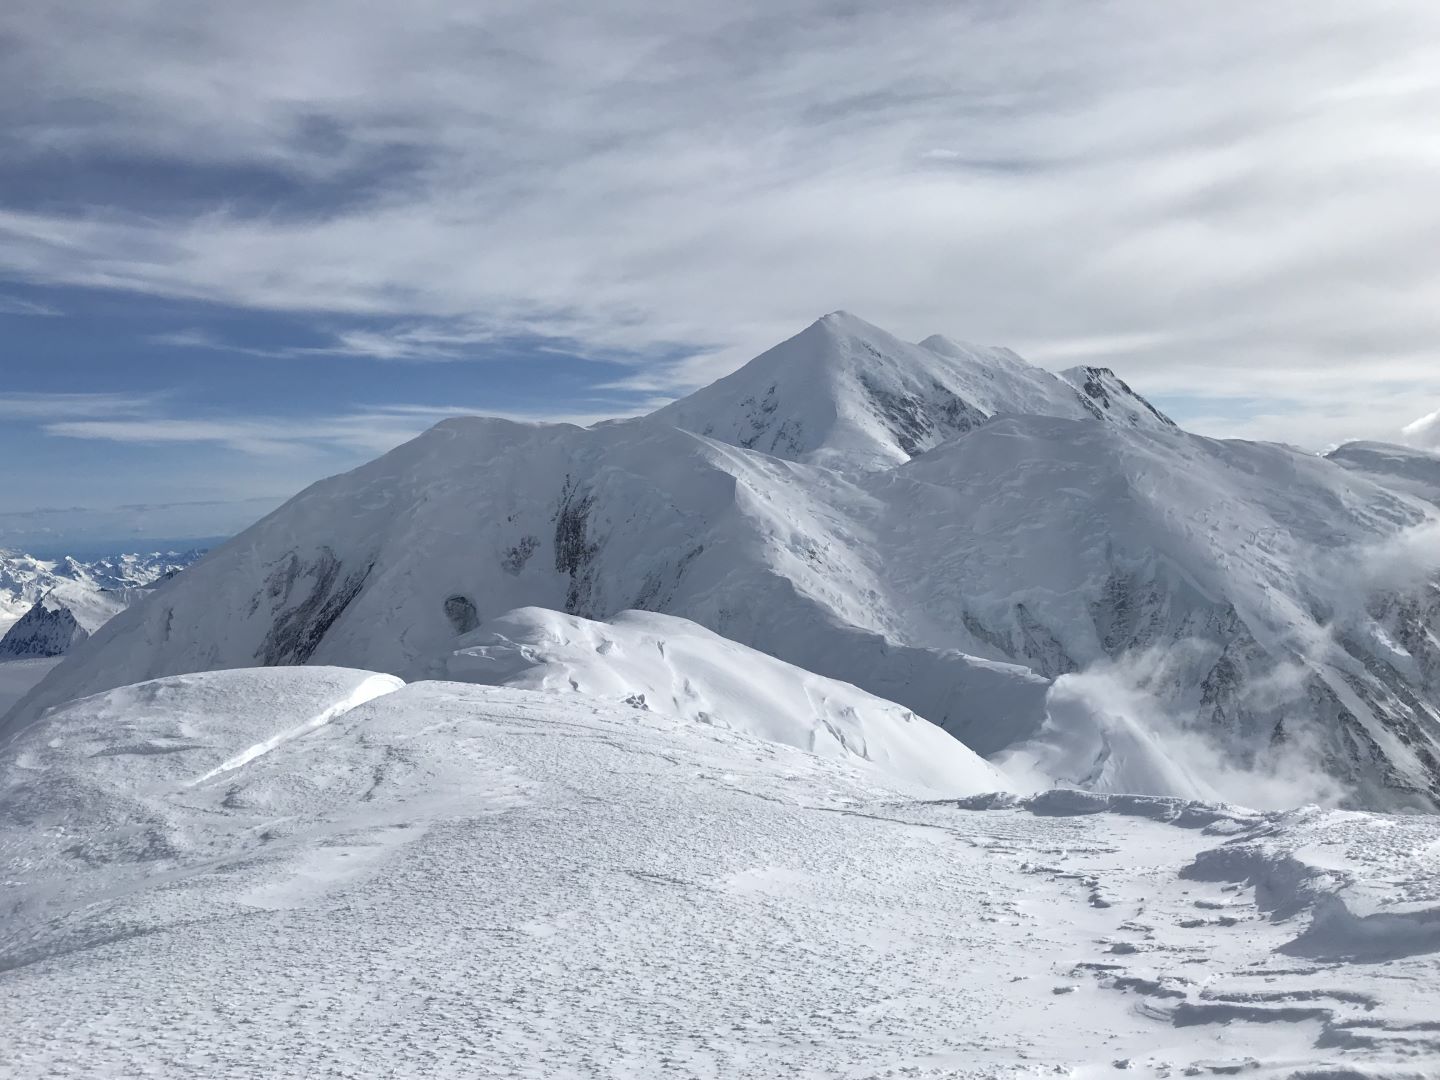
Next objective: traverse ridge from right to left up Mt Crosson, then down the saddle, up Peak 12472. Foraker looms right behind the saddle
Be cautious of huge cornices
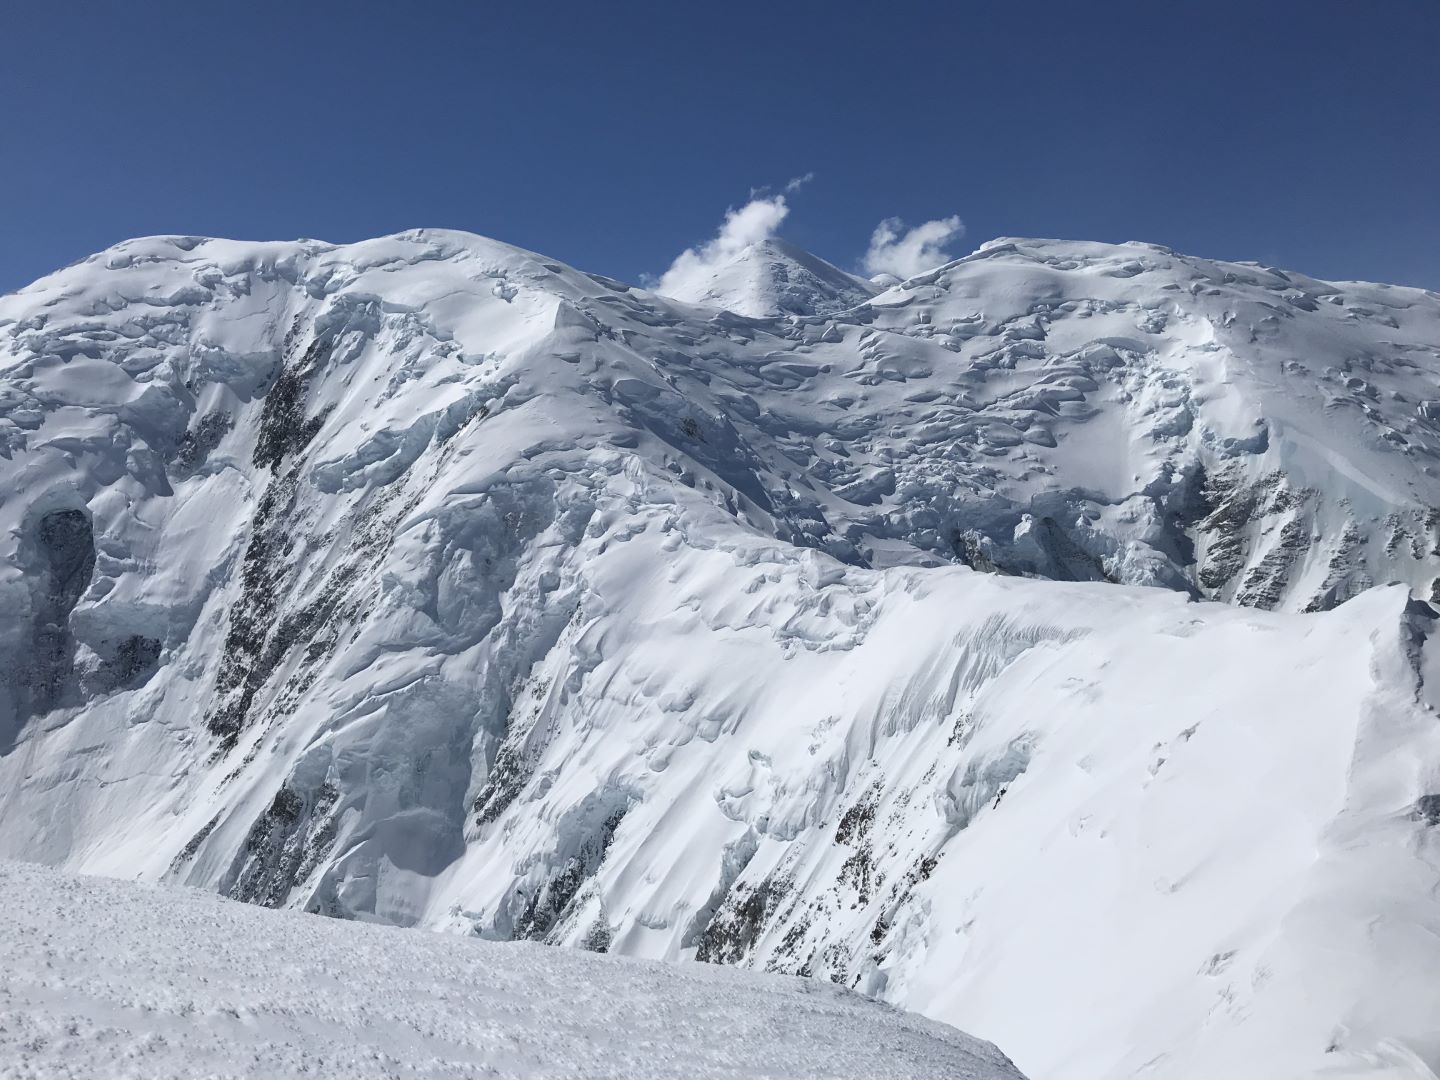
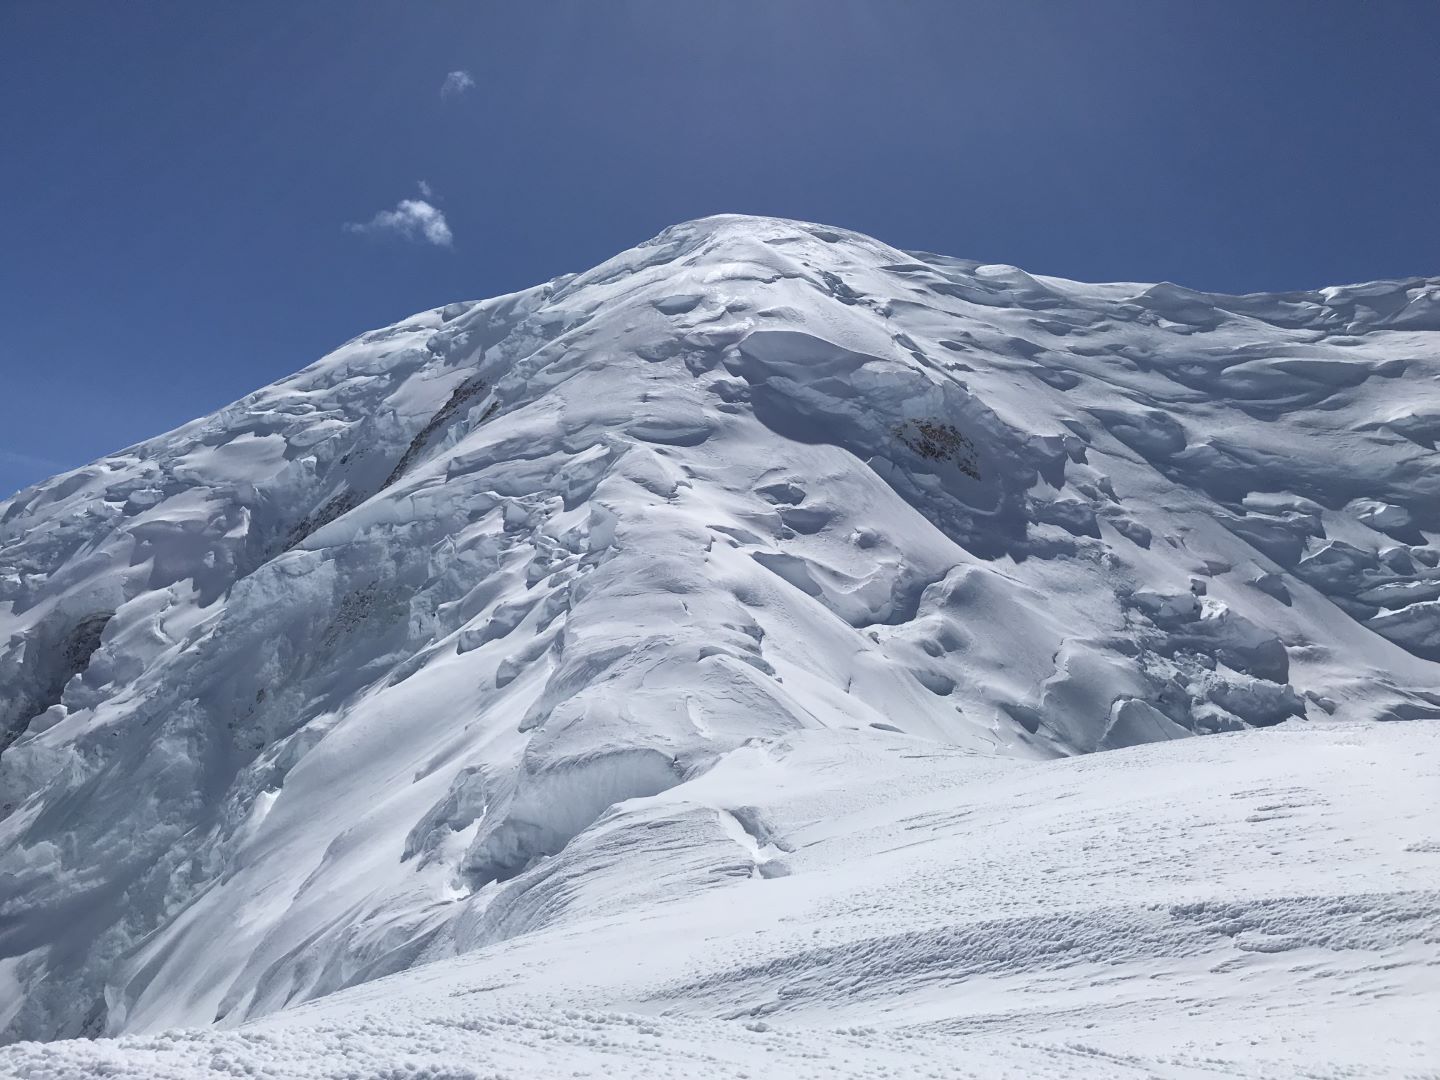
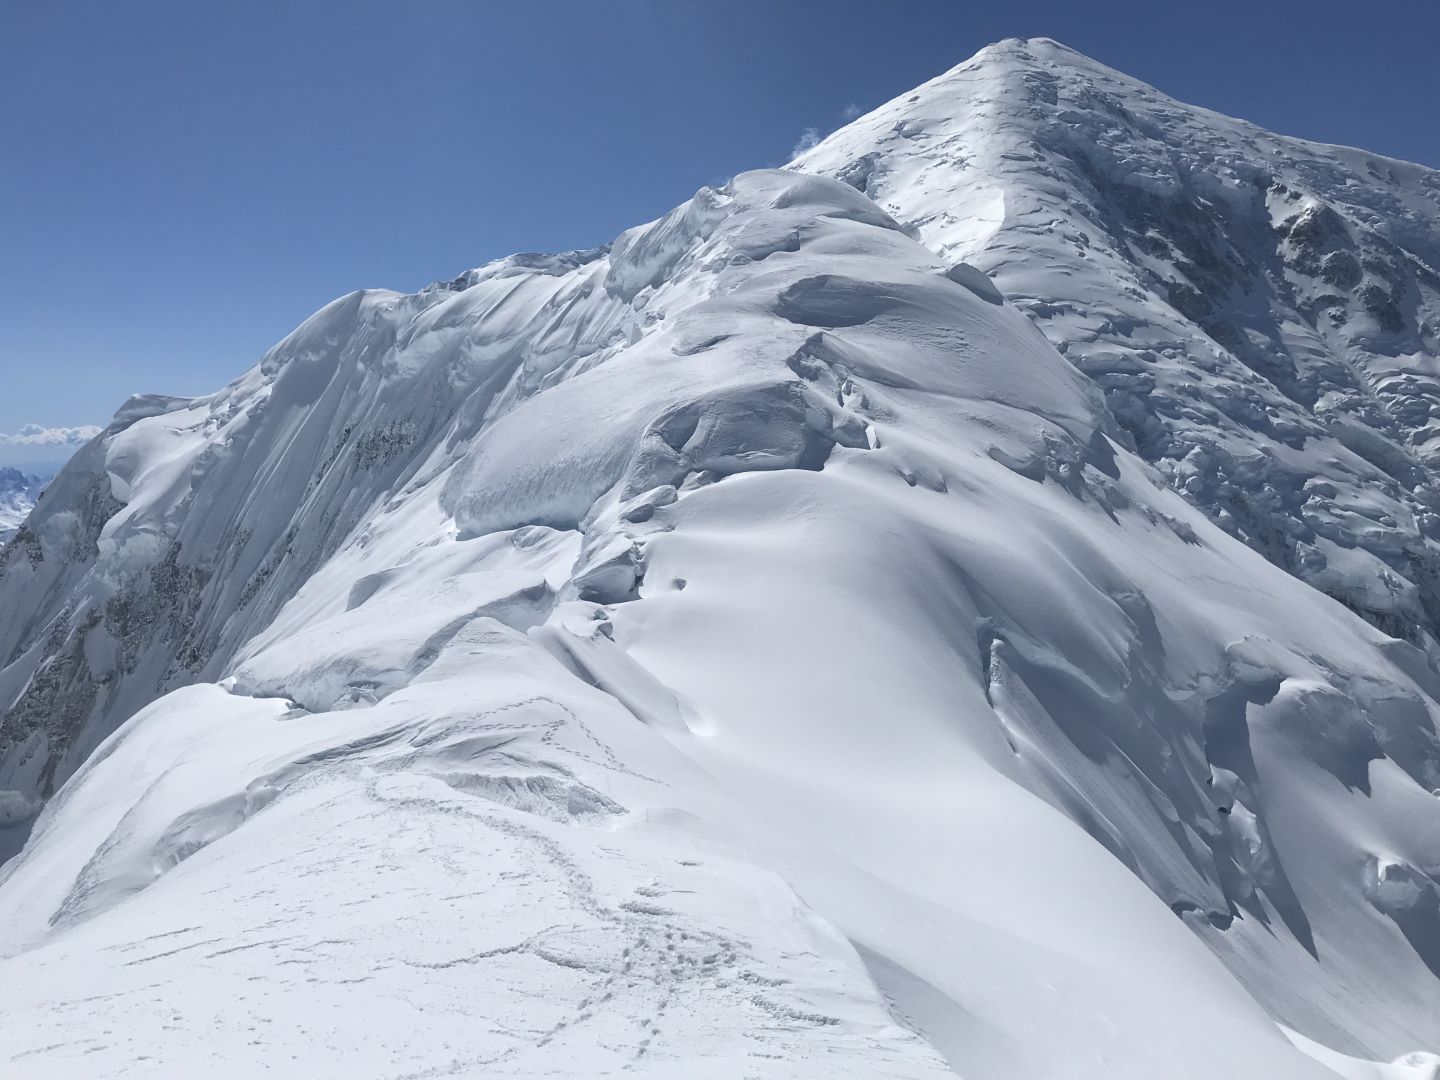
The north ridge up Mt Crosson
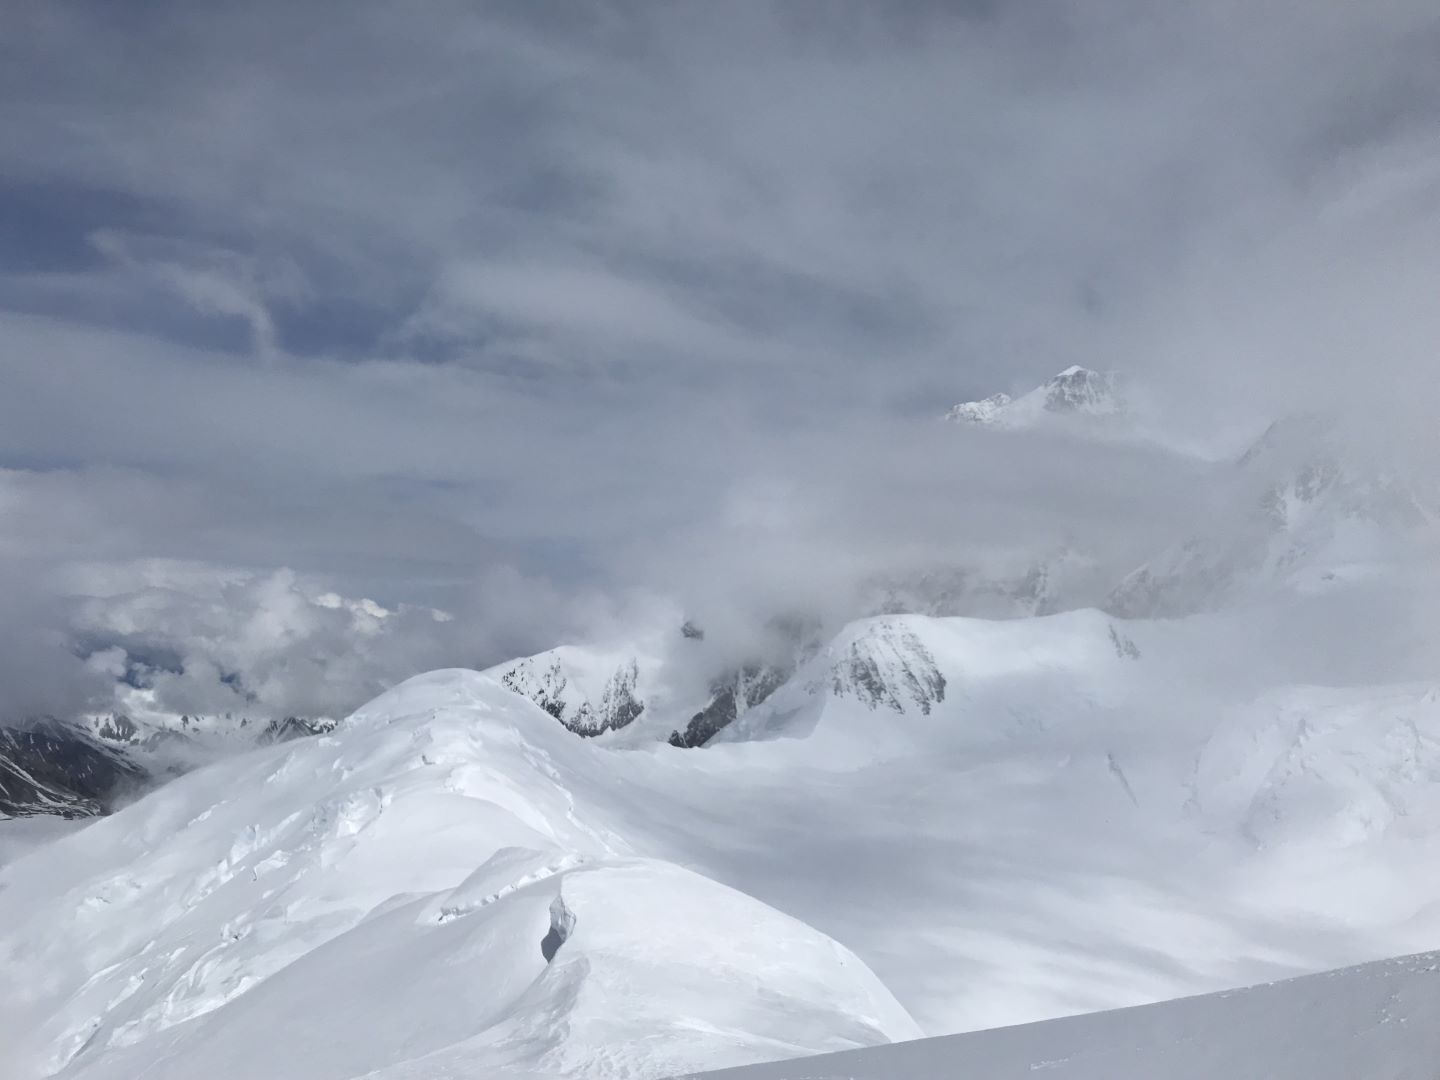
Looking across the saddle to Pk 12472 and clouds coming in
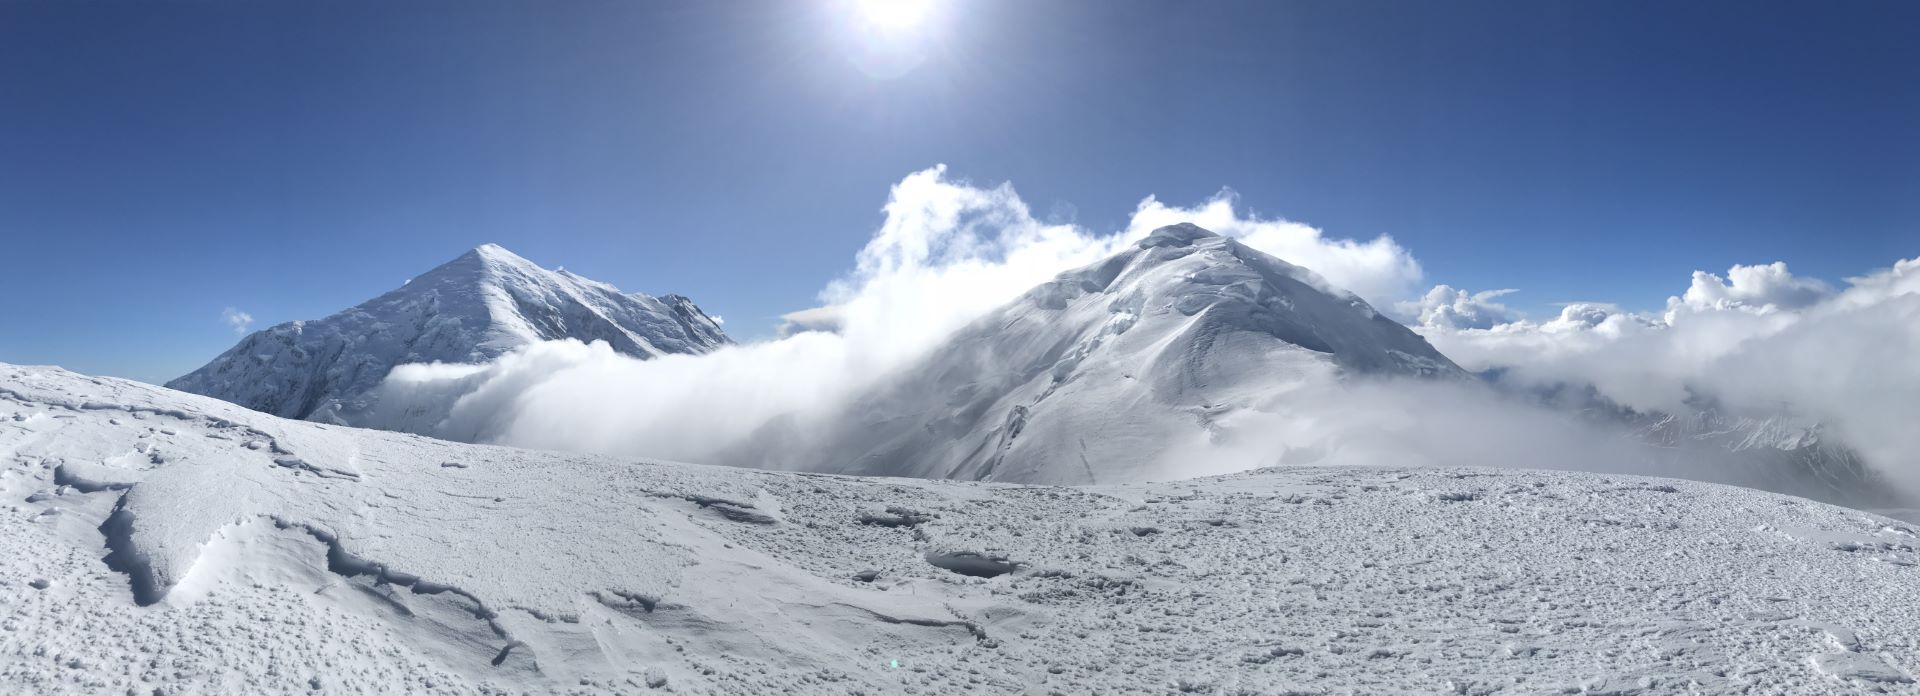
Foraker and 12472 from Crosson
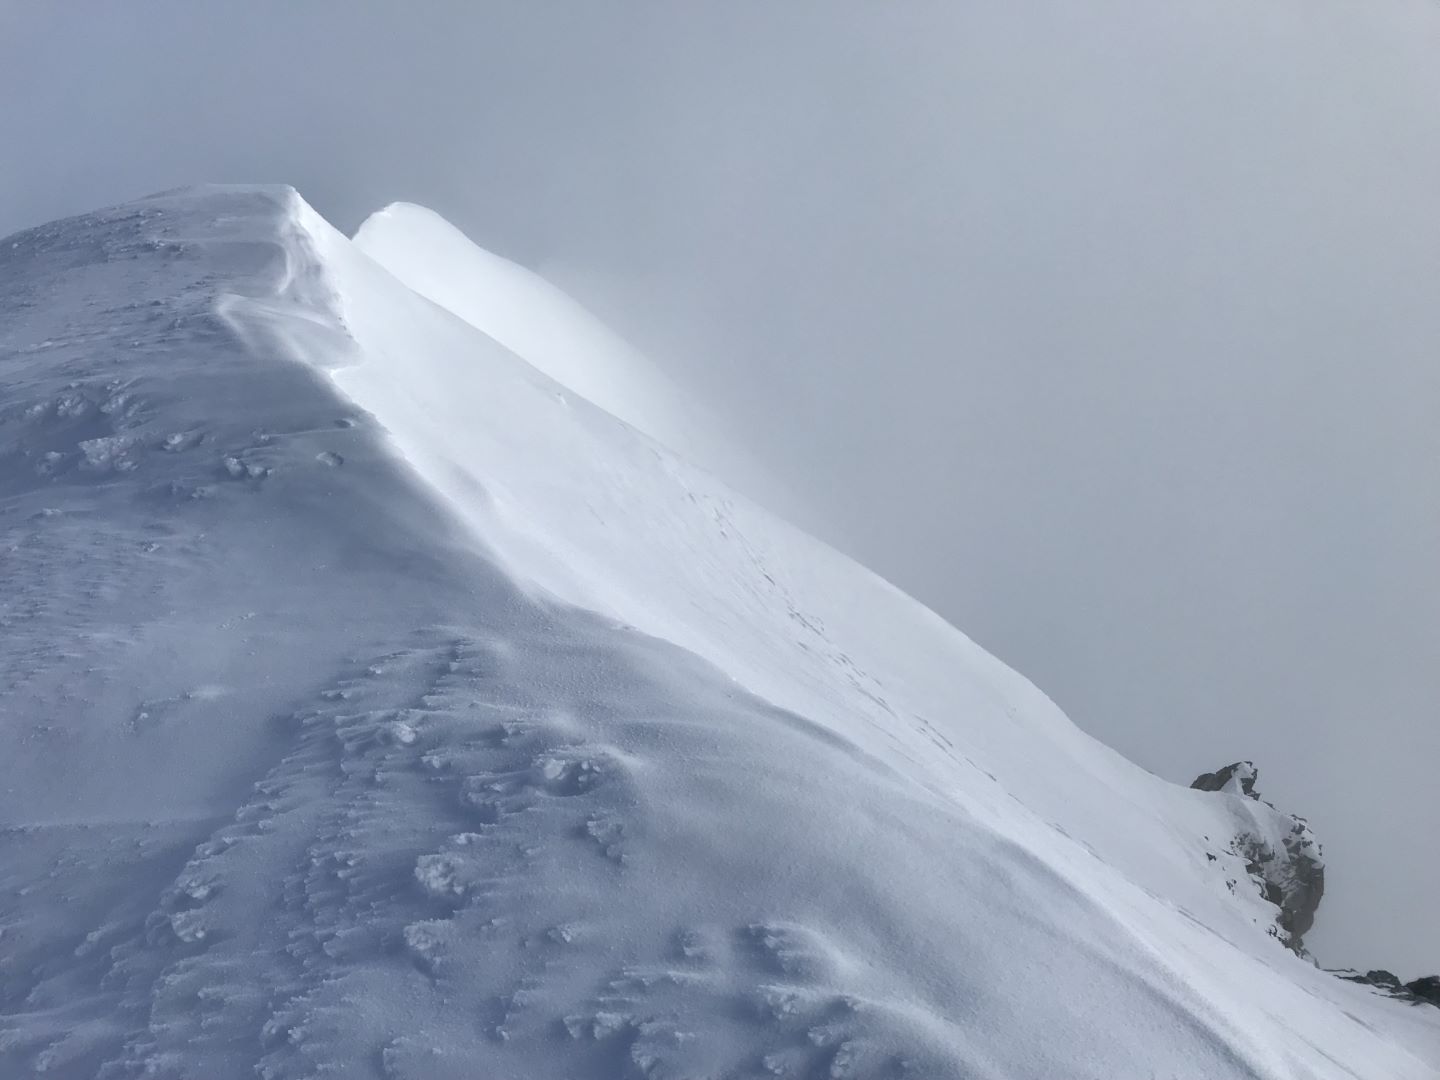
Sharp ridgeline in the clouds
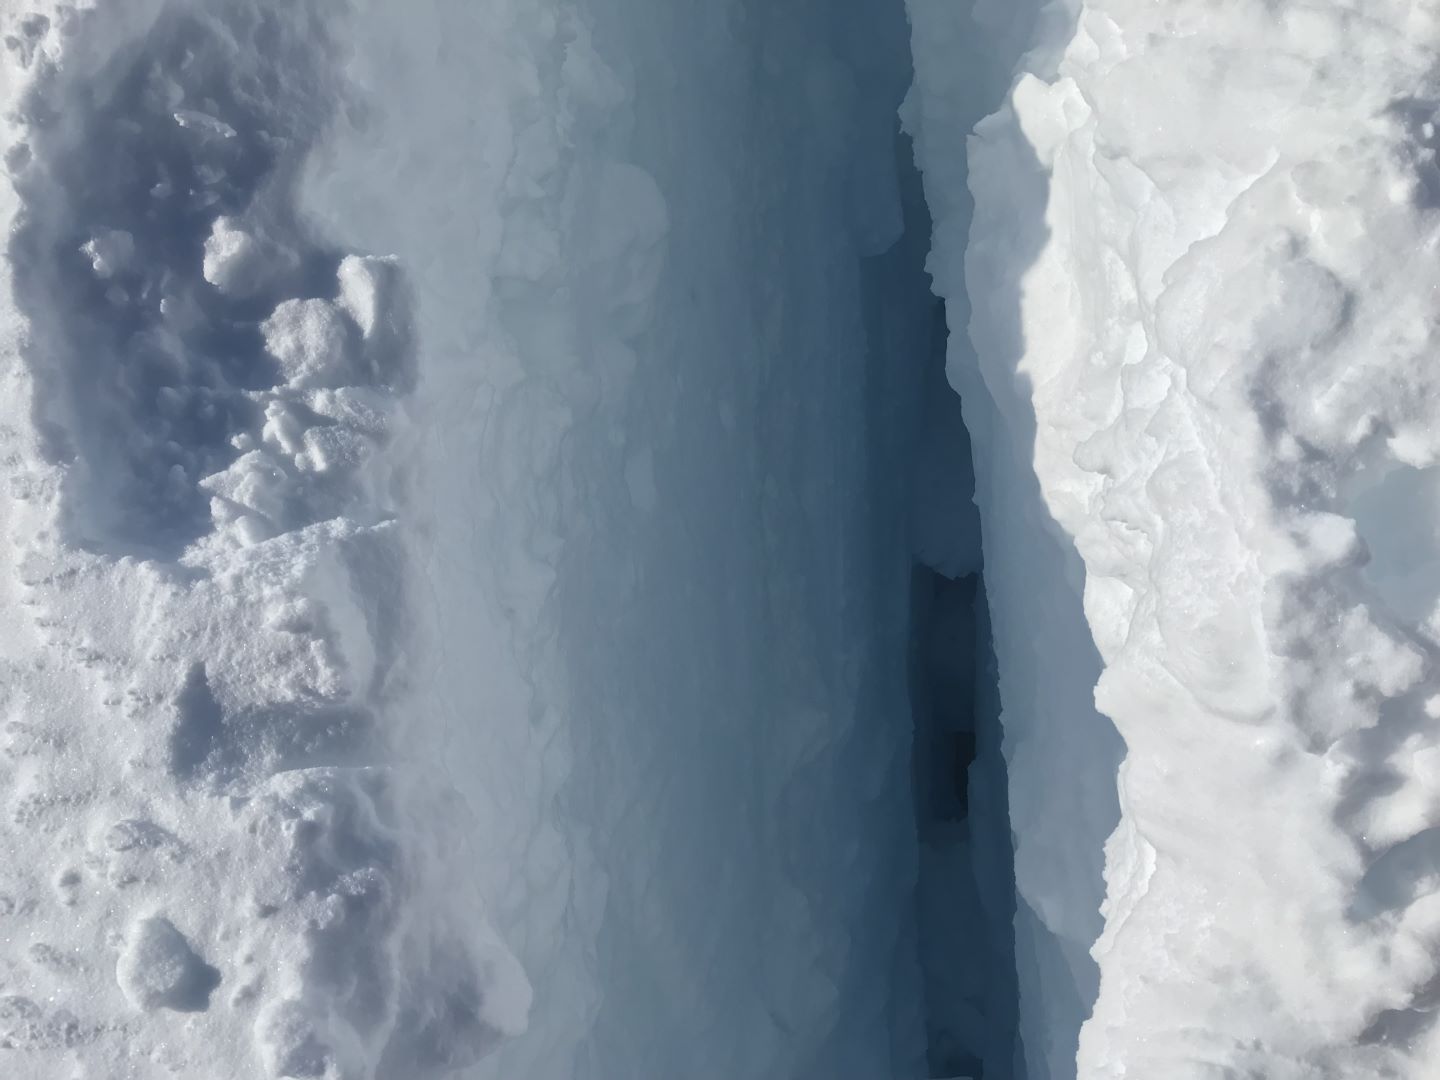
Crevasse next to camp
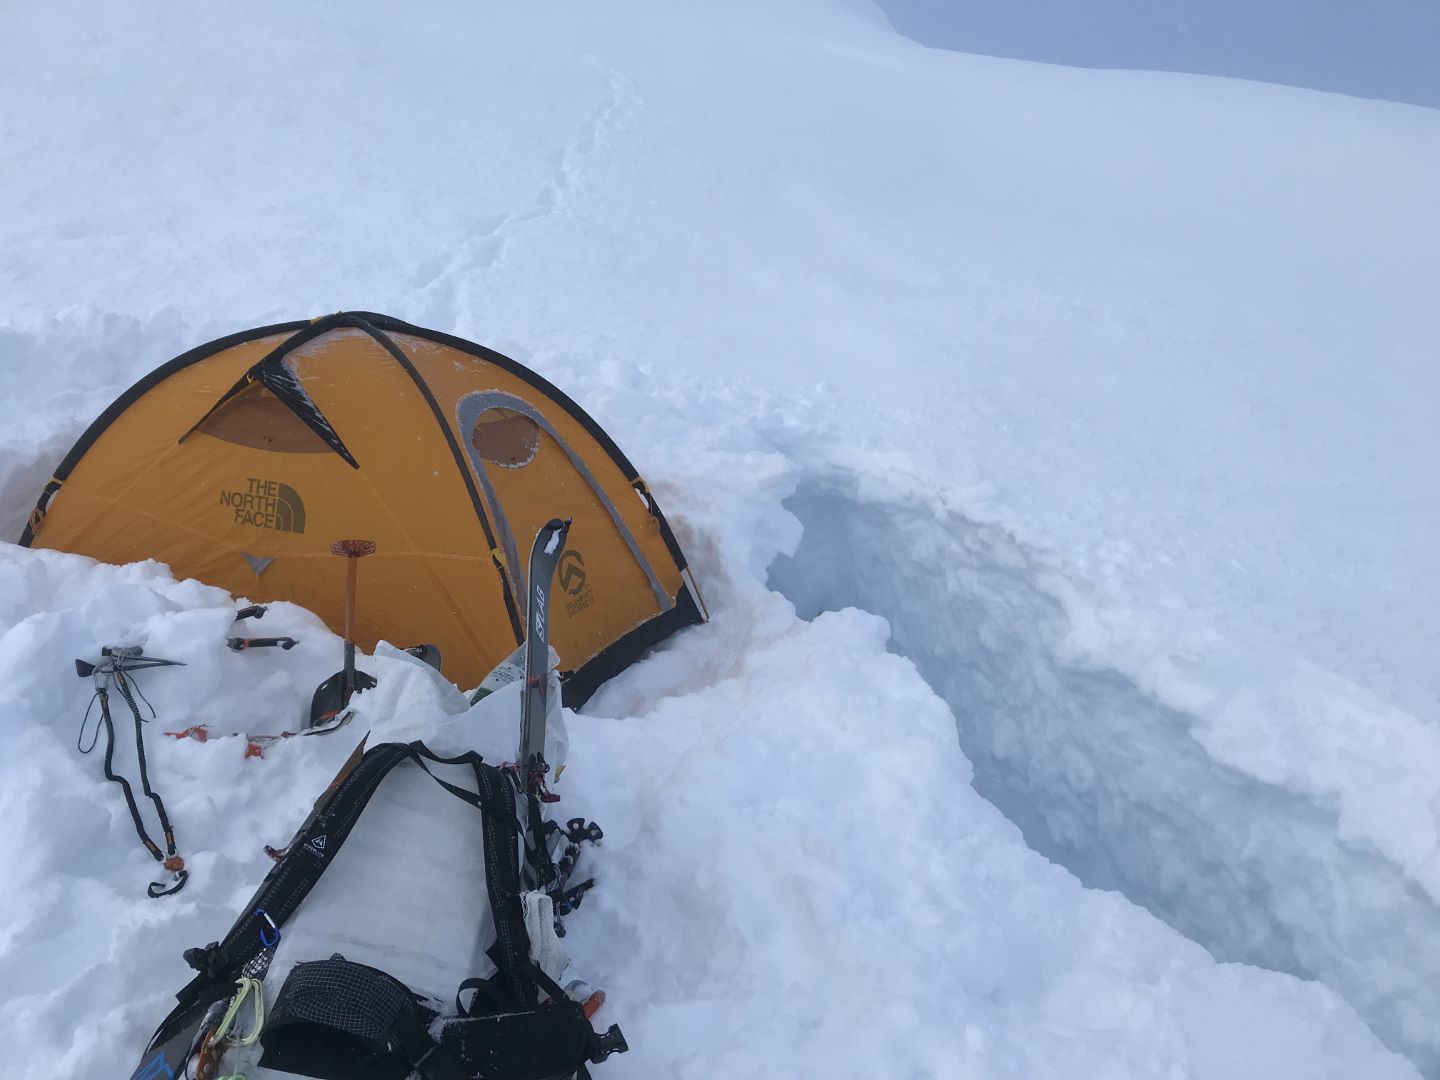
Looking into crevasse
Day 7 (Saturday, June 2): Today was a disappointing day. I had a lazy morning because I figured the ridge to the base of Foraker would be 3 miles of easy traversing. How wrong I was. The first quarter mile or so was straightforward, but then the ridge dips to its lowest point along this section between 12472 and Foraker. Where there are saddles/cols/dips like this, the wind accelerates as it gets funneled through there, causing way more gnarled features than the rest of the route.
Ahead lay giant crevasses and smooth snowfields with who knows what lurking underneath. My progress was halted by a crevasse maybe 10 feet wide. There was no way around it, so I drove my picket into the snow to make an anchor, roped up, and belayed myself across. The snow bridge held my weight. I looked around for how to continue. To the left were cauliflower seracs with obvious crevasses under them, slowly making their way down the very steep east side. The right, west side of the ridge had beautiful fields of smooth, rolling snow, but these covered huge crevasses. The way the bumps in the terrain were, there was no way to see behind them to navigate. The only feasible way I could see to go required crossing at least two huge, covered crevasses.
With three dangerous miles to go and not knowing what lay beyond the half mile that I could see, I decided to turn around. Self-belaying across the remaining ridge seemed tedious and time consuming, and there was no guarantee that I’d be able to reverse my route for the way back down. This was beyond my risk tolerance for a solo mission. I don’t often give up in the mountains, but I knew going into it that this was a lofty goal with a high chance of failure. I’m neither sad nor upset. I feel I made a wise decision and the right decision.
After turning around, I quickly got back to where I camped and put on crampons for the steep climb back up 12472, retracing my steps from last night. It was in the middle of a warm day and the snow was horribly balling up on my crampons. I could see all of what was in the clouds last night - my route was indeed pretty scary, especially having to ascend the small crevasses that I had crossed on the way down. Going down is easy, you can almost jump over them or carefully and quickly step across. But the way back up requires you to kick your feet in to gain vertical and slam an ice tool in for purchase. If the snow is too weak or you pick a bad spot, you’ll punch through; maybe even collapse the thing and take a big fall. I made an effort to cross them as fast and carefully as possible. Once I reached my high point, I put my skis on for the descent to the saddle between 12472 and Crosson. I didn’t even bother to take my skins off. The snow wasn’t good for skiing, nor was the heavy pack.
I decided to stay here for the night because the descent down Crosson is a very steep 6000 vertical feet, all east-facing. In the evening, this is in the shade, so the snow refreezes and would be treacherous to descend, especially after a long, stressful day. I made it to the saddle by early evening and had plenty of time to build a bomber tent platform, dry out gear and cook dinner in the sun’s warm rays.
Ridge to Foraker doesn’t look bad from here
My footprints below where I turned around. Nasty crevasses on the left and smooth hidden dangers on the right
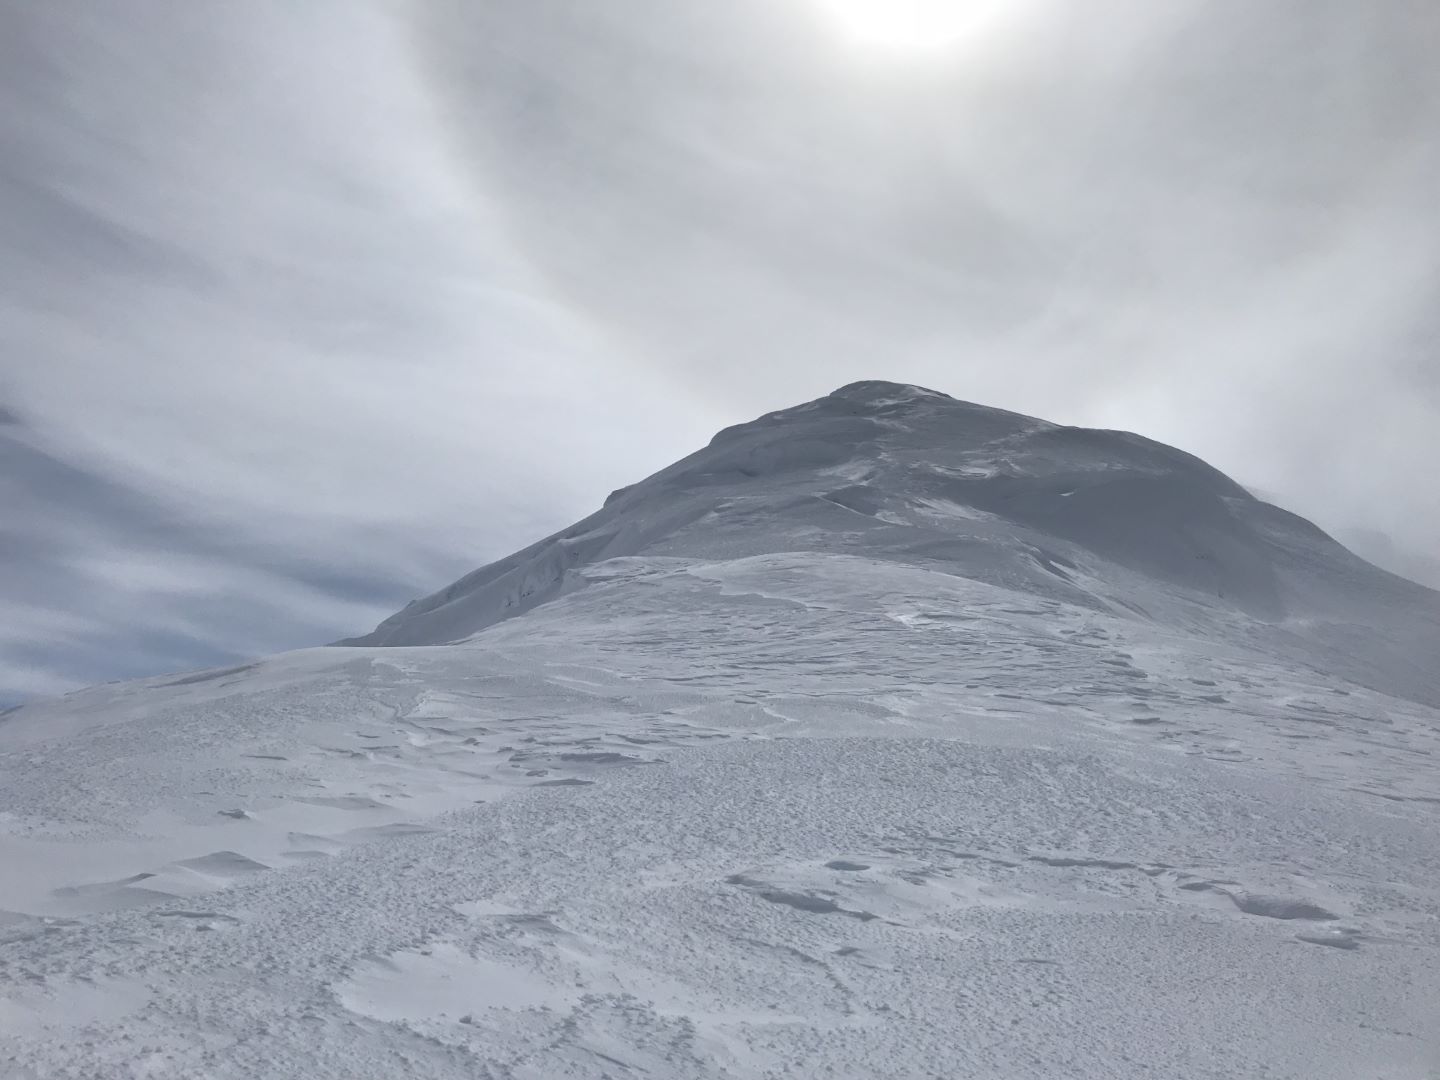
Looking back as I climb 12472

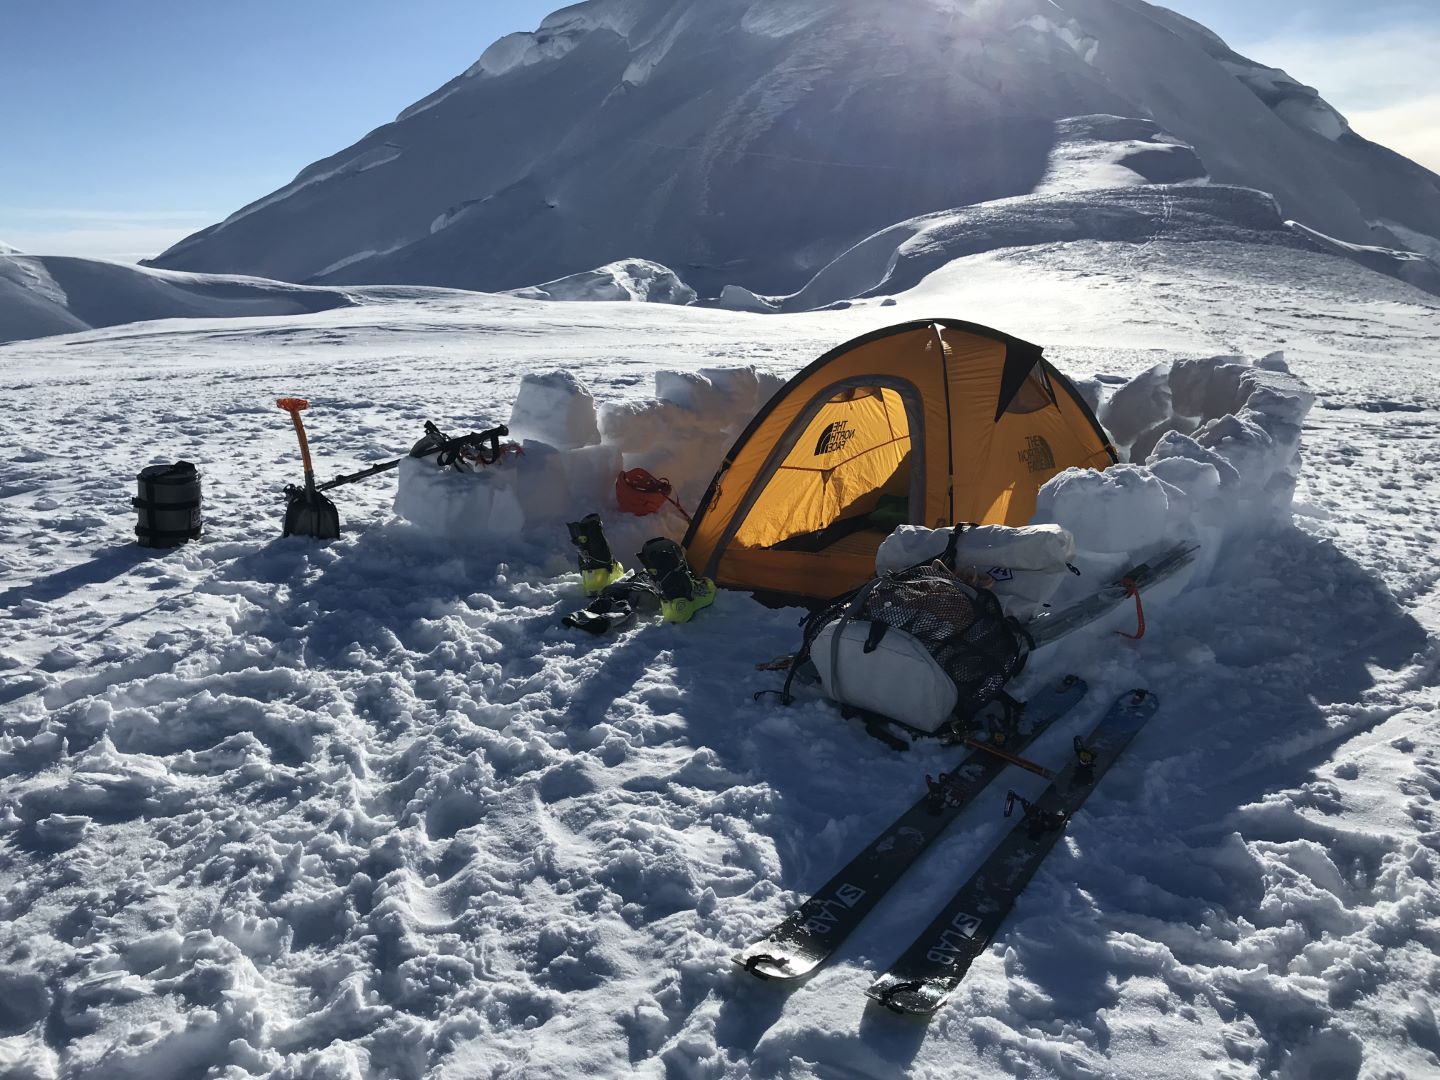
Solid camp
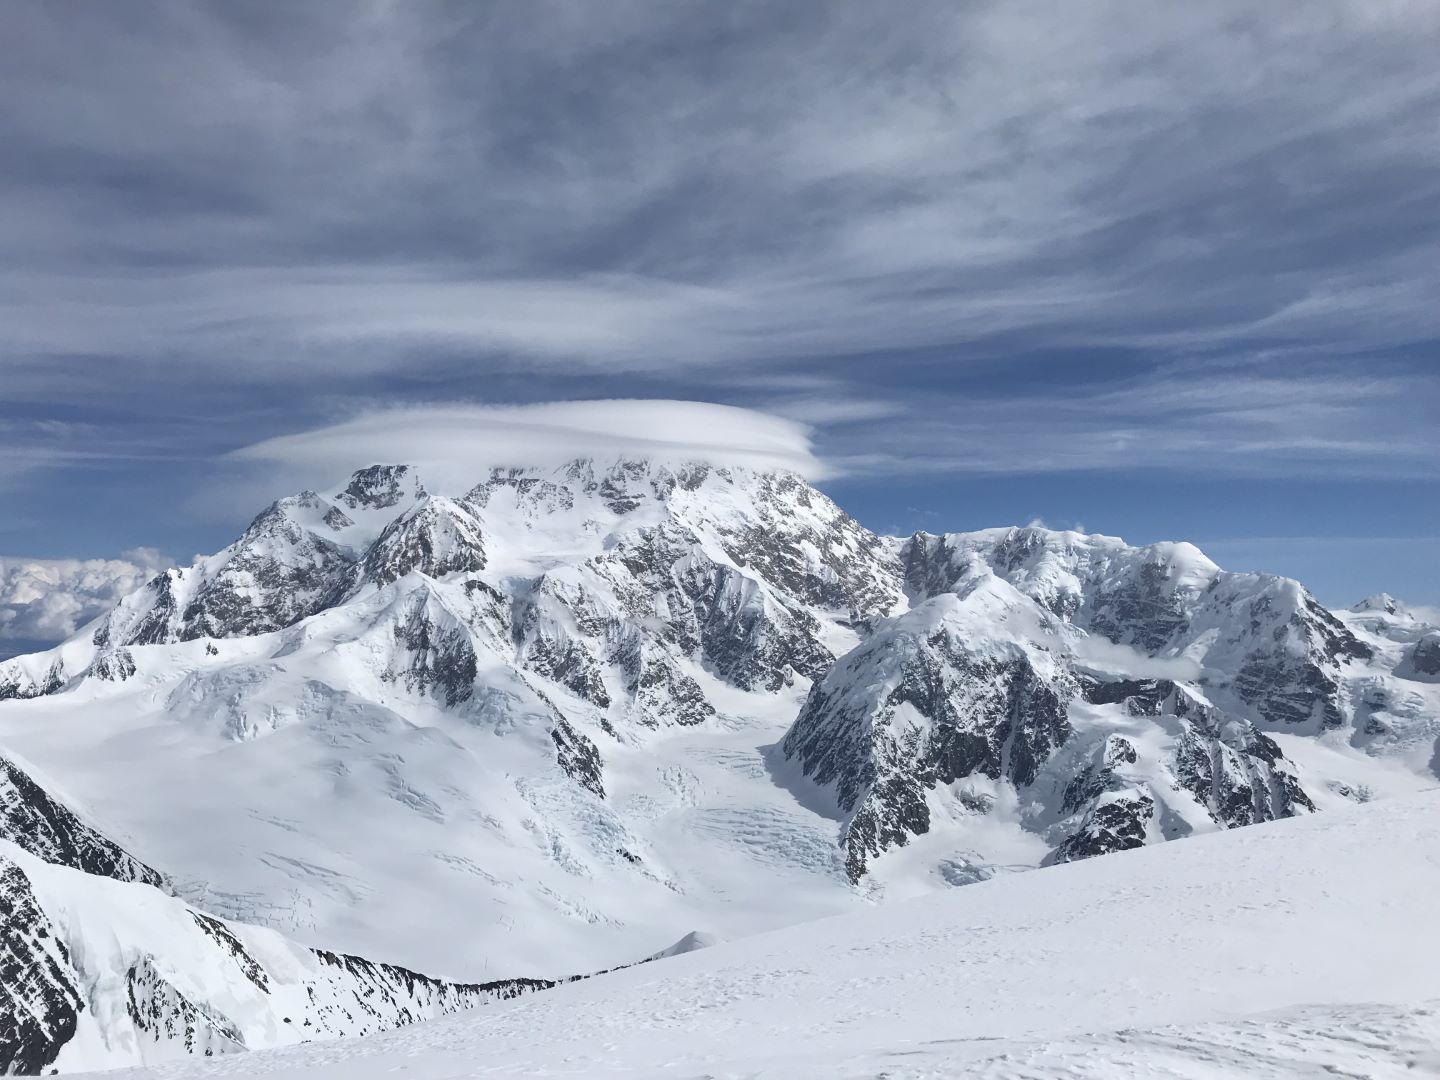
Day 8 (Sunday, June 3): I thought this would be an easy day. Where I was perched, the sun stayed up late and also shined on me early in the morning. It was a calm, warm (for Alaska) night. I got an early start, but as I was getting ready, the wind picked up and it made taking the tent down a real affair. A huge lenticular formed above Denali, a sign of high winds. Foraker, however, looked perfect. Today would’ve been the day.
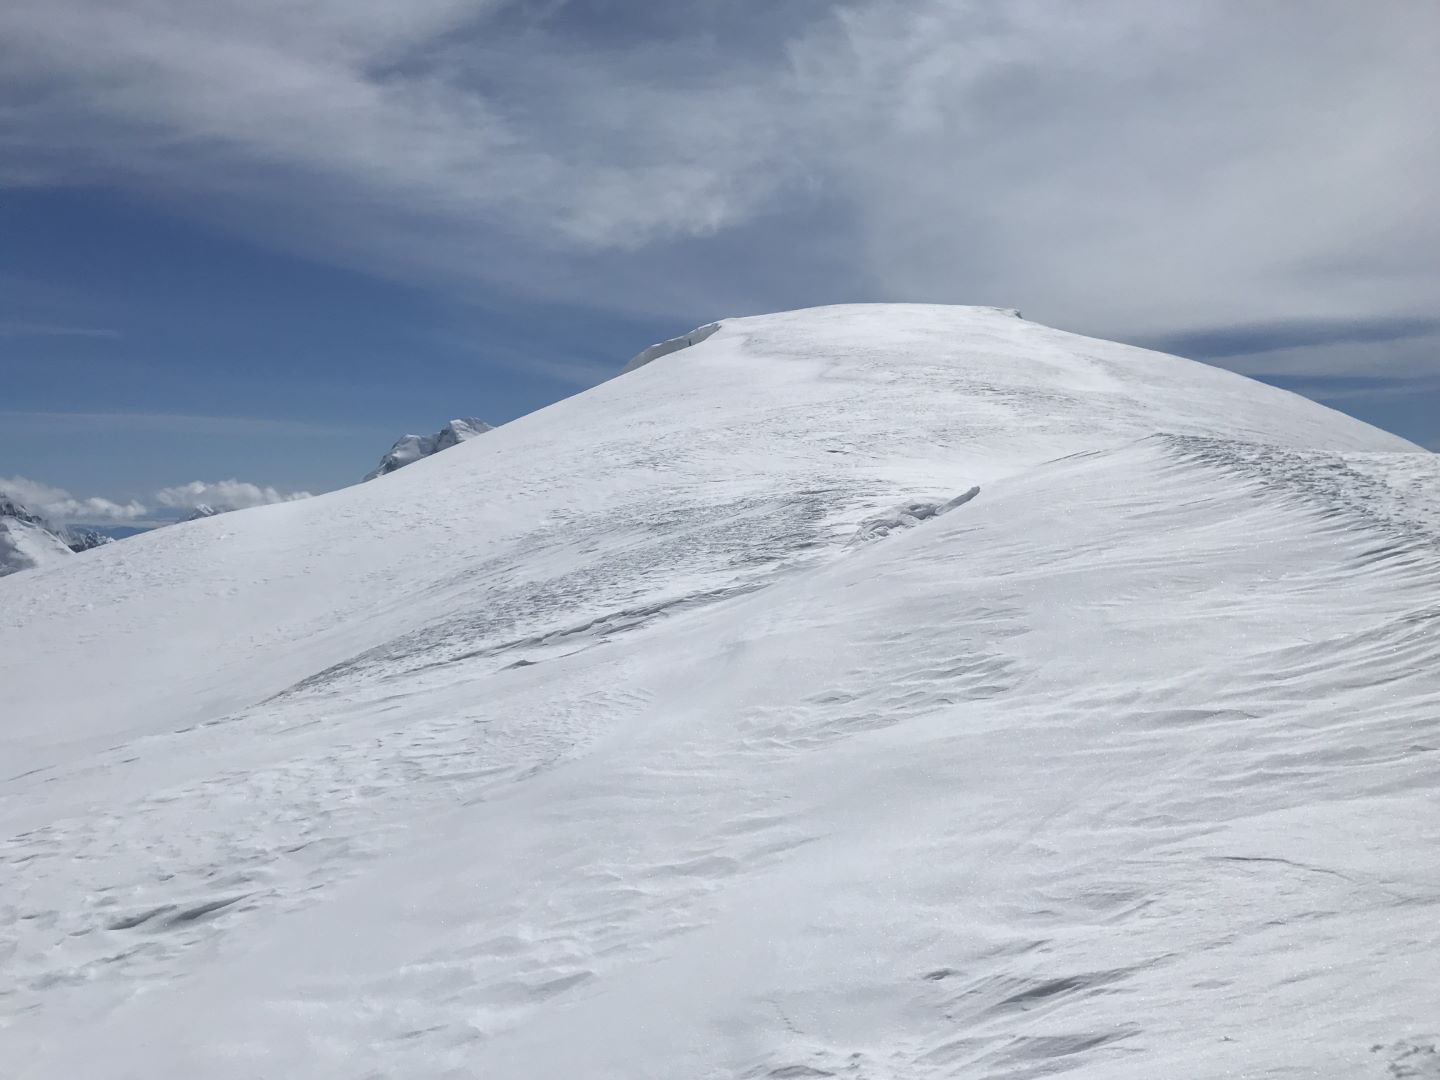
A mile long gain of 1000 ft was all that laid between me and the summit of Mt Crosson, the peak guarding the exit of my route. I should have used skis, but I knew the descent would be steep and I’d want crampons and ice axes, so that’s what I started with, because I didn’t want to transition at the windy summit. I took some photos at the top, the views in every direction were phenomenal. The beginning of the descent started out easy, and the snow was perfect for taking big, secure steps down.
After a few hundred feet, the difficulties began. As Ranger Mark stated, and my observations at the start of my journey confirmed, the top of Crosson was pretty messy with crevasses. I didn’t take a photo with my phone when I started, so I couldn’t plan my route like I could with the other tricky sections. I had to cross a very thinly covered crevasse that I knew would break through if I stepped on it, so I made the wise decision to switch to skis; I find them much safer to cross sketchy crevasses. I cruised over it and continued to survival ski my way down very steep corn snow and over blind humps on this broad ridge. It was hard to be sure what side of the ridge to be on, as crevasses and weird snow cliffs/seracs were scattered about. I was surprised that I was able to ski, albeit very poorly, down these steep slopes with a huge pack on and deadly fall potential. But the snow conditions were excellent and without the pack, would’ve been prime skiing for 6000 vertical feet!
I didn’t notice the wind had died, and it got progressively warmer as I descended and the midday heat arrived. I was still wearing my puffy down layers and I was roasting. Skiing took my full concentration. The last thousand feet was heavy corn and I kicked off numerous small, slow wet slides.
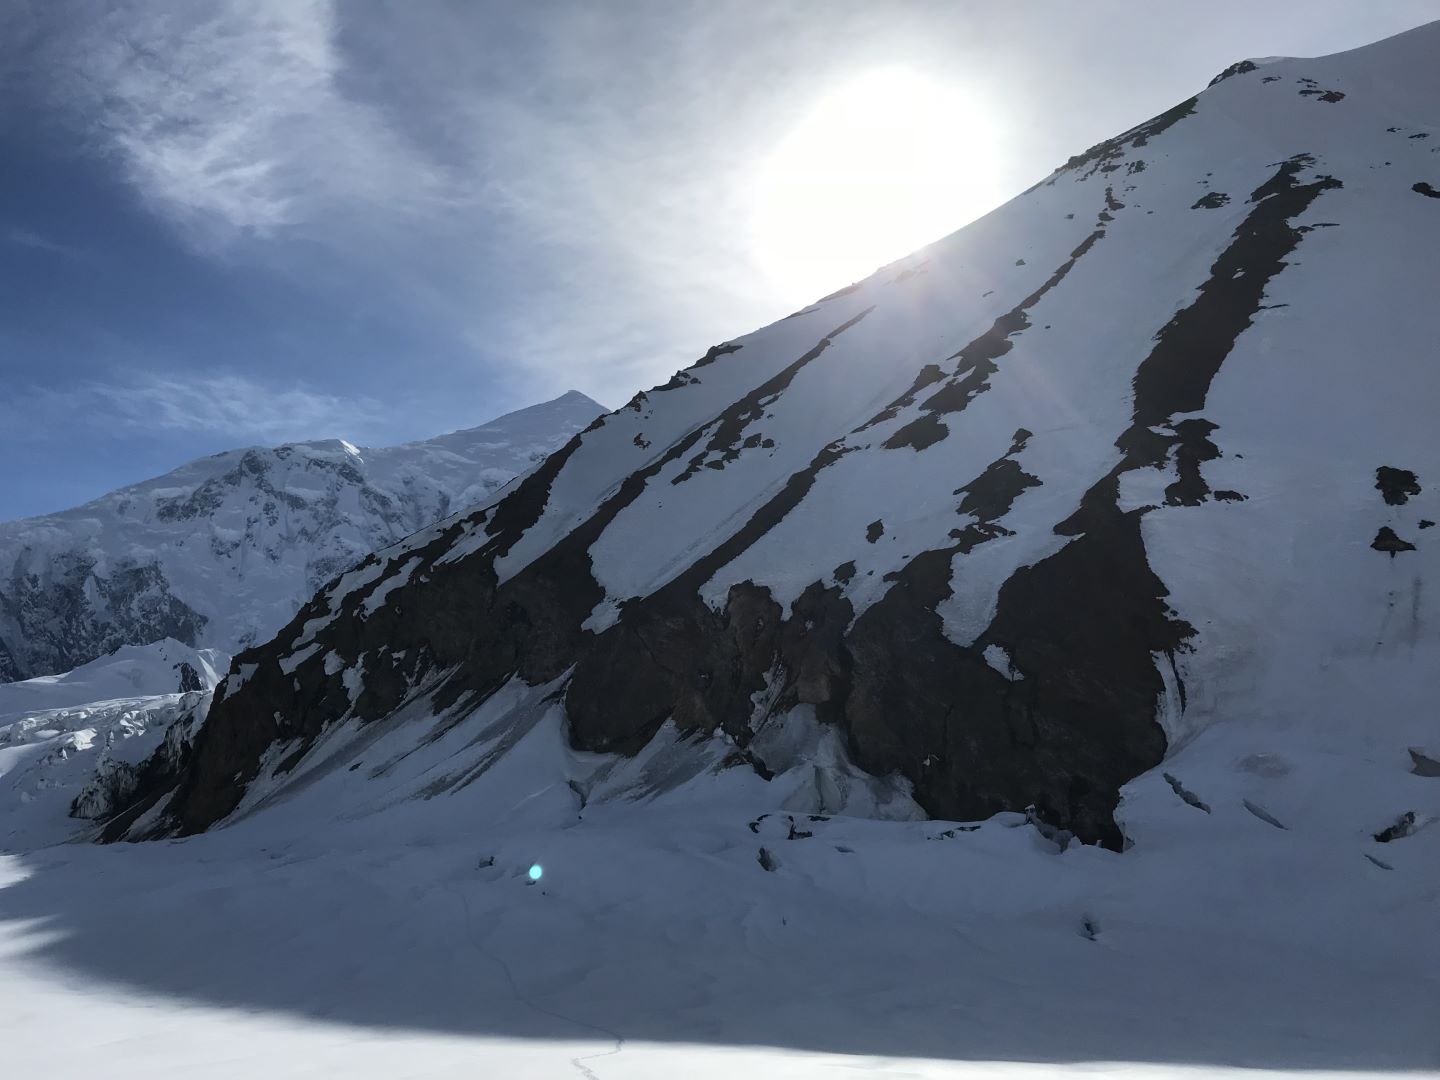
There are two ways to get off Crosson and onto the Kahiltna glacier. The first is a south-facing icy, rocky gully that dumps you out into an ice flow and then a very crevassed area of the glacier. Not a good solo option. The other way down is a southeast-facing handful of snow chutes with thin, rocky ribs separating them. From year to year, the conditions on these change dramatically. And I didn’t have a photo to help guide me. What I did have, from about 10300 ft and below, was an old boot track and ski tracks from some party earlier this season. Unfortunately, I lost the boot track, as roller balls and rolling rocks down mushy snow look very similar to an old booter. The ski tracks I could follow, and I did to where they ended at the top of one of the rocky ribs.
I wasn’t sure which chute to descend; the slope gets steeper near the bottom so you can’t see how it merges with the glacier below. Of course, I go down the wrong chute and get seriously cliffed-out. Off come the skis and I boot back up. But I didn’t think to take the other chute the skier could’ve gone down. In all fairness, I couldn’t see how it ended and cliffing out seemed likely. Instead, I traversed across a few chutes and ribs the other way, as I saw what looked like a debris fan that would allow me to get off the peak and access the glacier. I got pretty nervous and stressed out about not being able to get down, so I radioed NPS for help - I was hoping they could just tell me what chute to go down, but nobody really had good eyes on it. This was mentally exhausting. Not only did I have to get off this mountain, but then cross a heavily crevassed section of glacier, solo, before merging back with the main trail.
This challenge was no longer fun. Traversing the chutes was tedious. I got soaking wet from the knee down, as my feet kicked through heavy corn and rotten snow underneath. I would often punch a leg all the way through to my crotch and sometimes my foot would get stuck. It felt like wading through muck. At the ribs, I was happy to be on rock, though it was just as loose and rotten as the snow. But at least it wouldn’t devour my legs. Or so I thought. I made my way down the steep, sketchy rock, setting off small slides here and there. Pretty similar to class 3 descents in the Sierra. Only this black shale rock is quite a bit different than decomposed granite.
As I reached the debris fan I had seen from above, where pebbles and snow granules were an even mix, leaning up against the rock wall of the base of the peak, it started eating my legs! This wasn’t quite a debris fan like I had expected, rather, it was pebbles that constantly slide down and deposit themselves on the snow below. I was actually punching into the randkluft (moat) separating the rock from the glacier! This was so unique, unlike any moat I’d seen before. After fighting my way through and making minimal progress, I decided to put skis on. At least they’d keep me afloat. In a few minutes, I made it to the glacier.
I radioed NPS of my updated status and also told them that I would check in every hour as I crossed the glacier. The crevasses here are massive and endlessly deep. A sure death if I fell in one. It was slow going. In the more mangled sections, I would probe every step; shove my avalanche probe into the snow below me and make sure that it was going through real layers of snow and hit something solid (ice). The snow bridge over a crevasse feels the same at first, but then the resistance on the probe disappears and you sink it all the way in. Better move out of there quick!
I looked back at the chutes and ribs to see my mistake and heinous effort. Had I taken the other chute, the one with the boot track in it that I didn’t see, I would’ve descended seamlessly to the glacier and saved hours of frightening effort. Hindsight, literally. After almost two hours of skinning across the wide glacier, I merged back onto the trail and relative safety. Psychological relief. But not physical. I lost my sunglasses during my struggles in the moat and my backpack killed my shoulders. I didn’t have weight distributed very well: CMC, crampons, and ice axes were hanging off the back rather than tucked in snuggly to the sides. I was too tired to fix this as I slogged back up to camp 1 and ate two freeze dried meals.
Huge lenticular on Denali
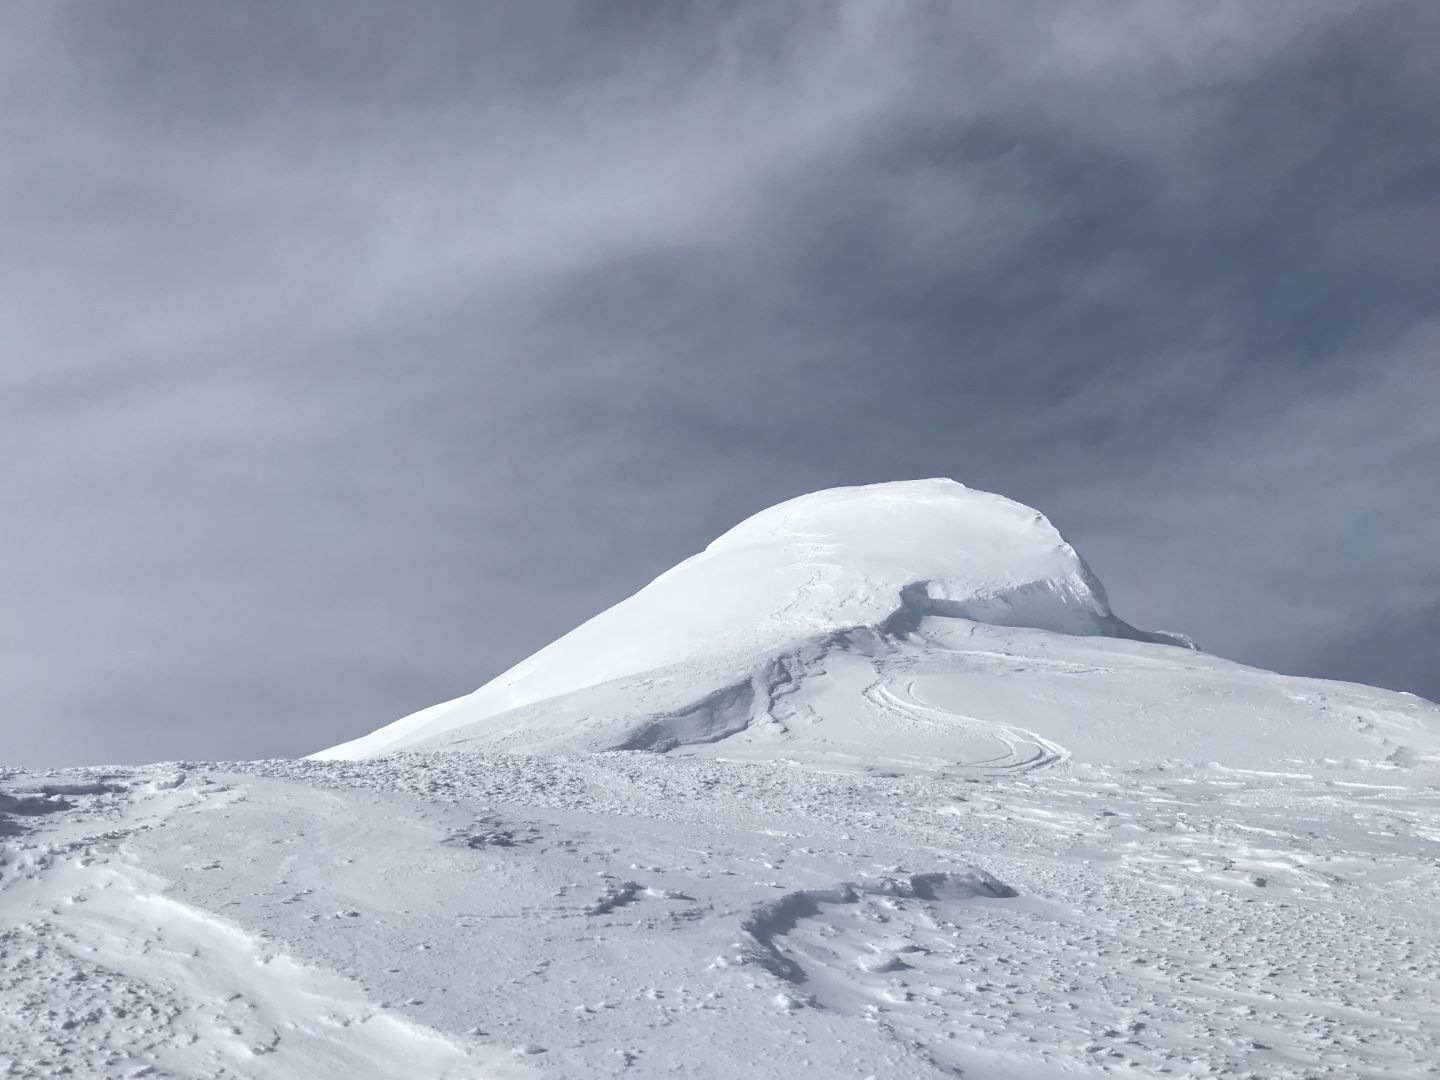
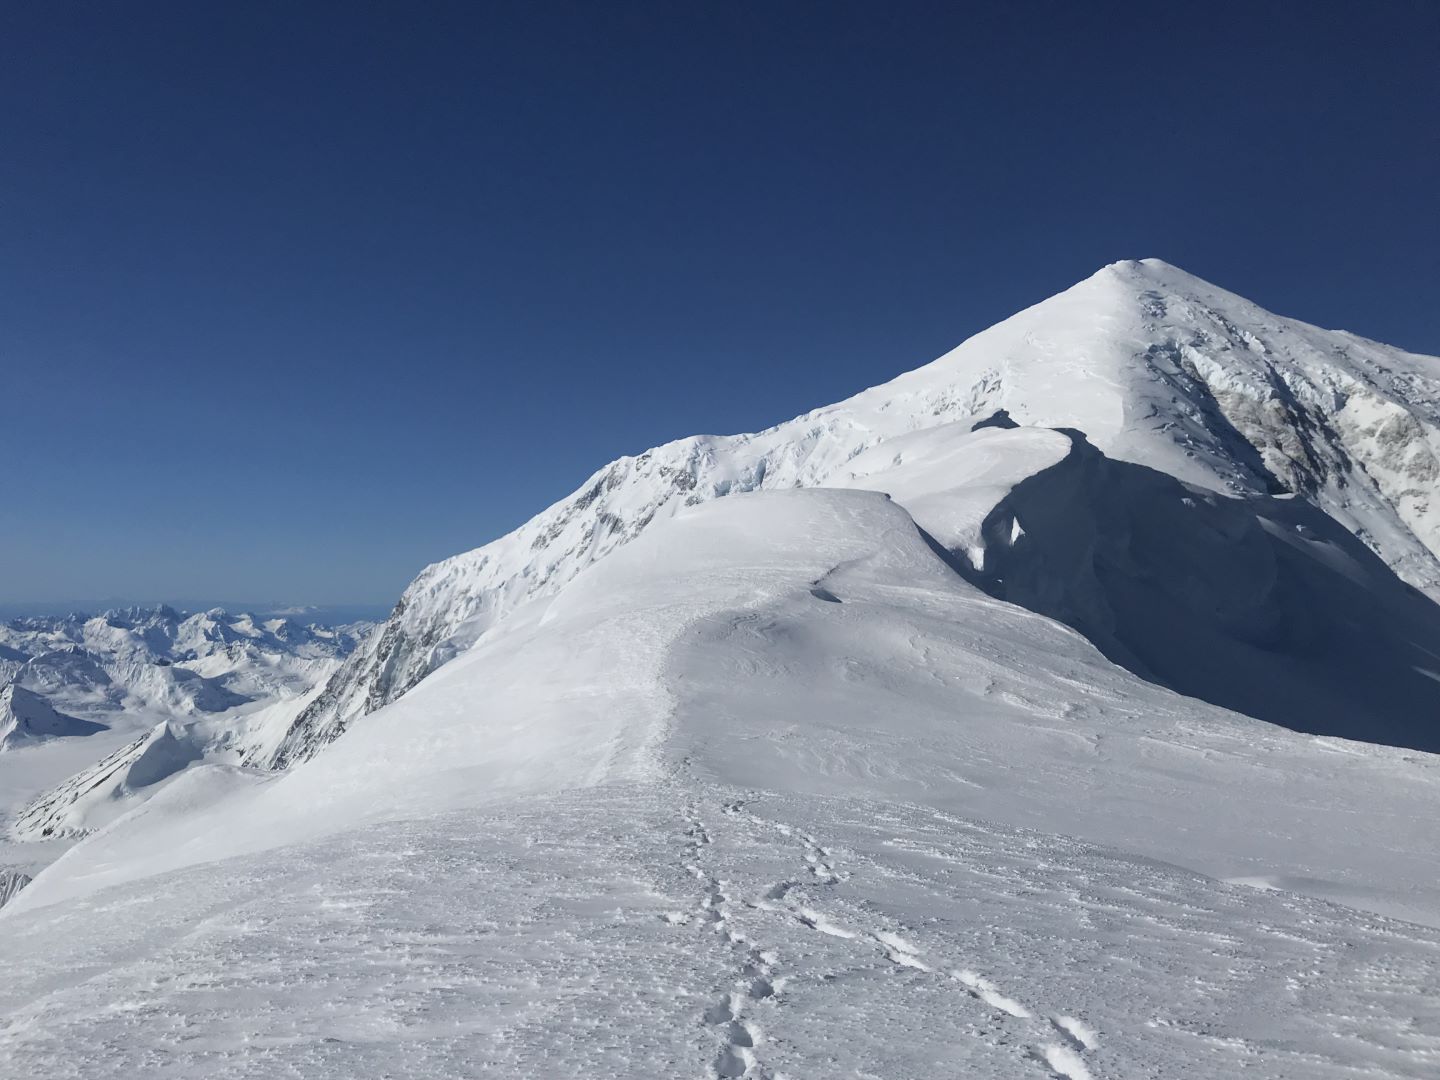
View southeast to the summit of Mt Crosson
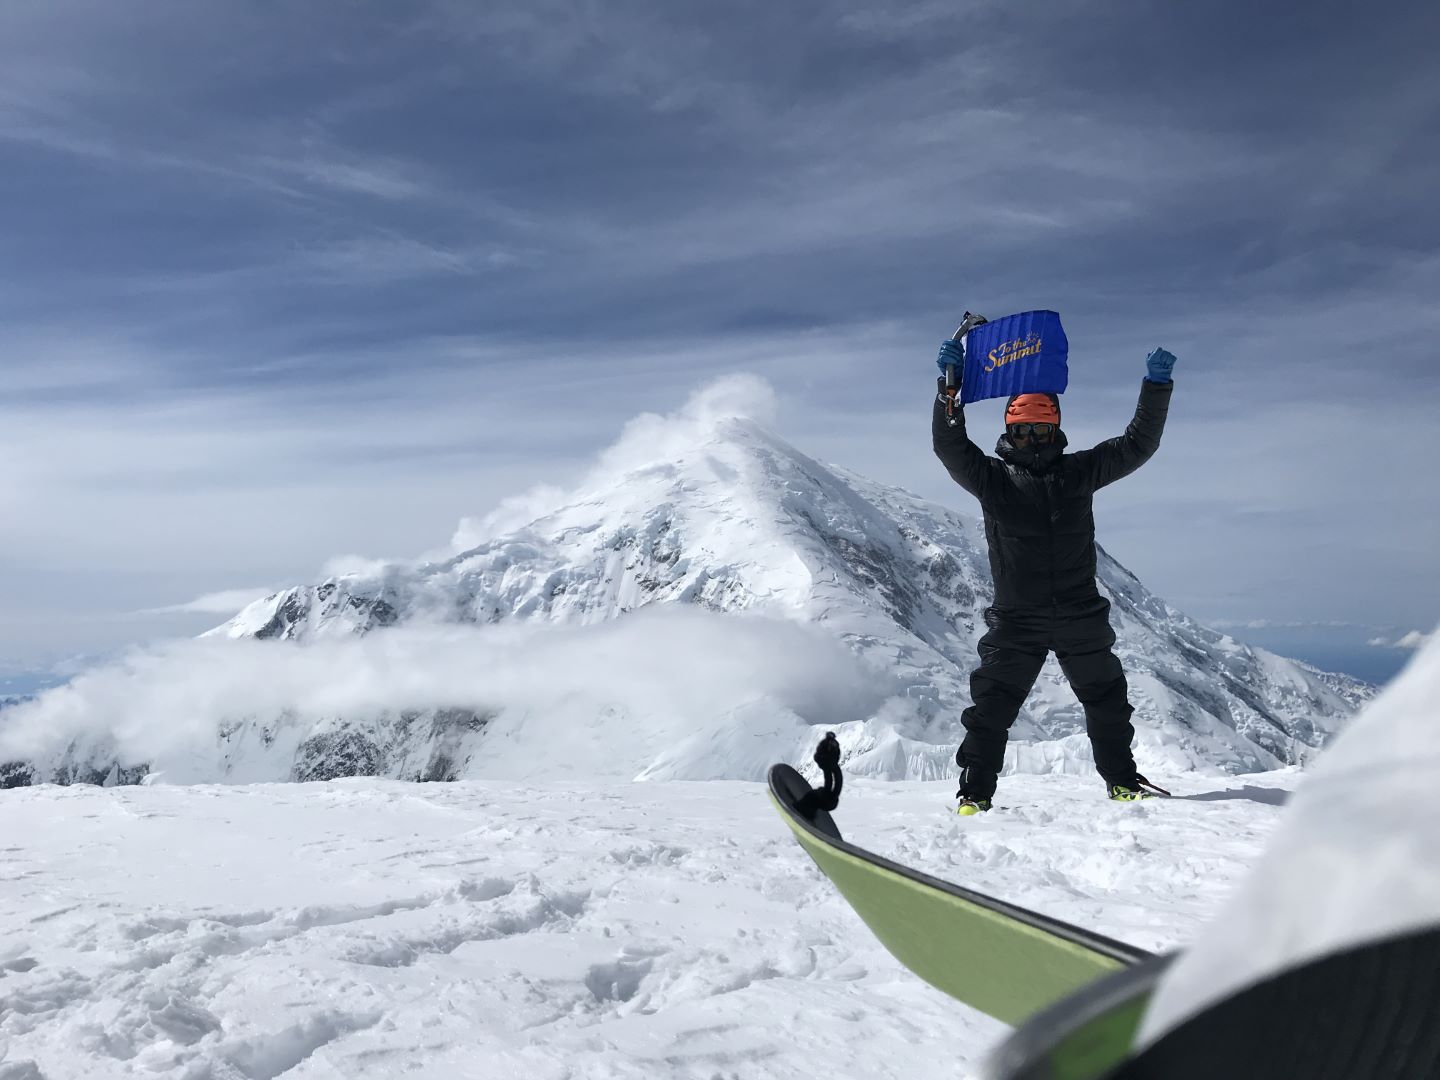
To the Summit! Foraker in the background
I went down the rightmost snow slope that ended in a cliff. Instead of going further right to get smoothly onto the glacier, I went farther left and scrambled down the cliff
Day 9 (Monday, June 4): I slept in and enjoyed the morning on the lower glacier, talking to my neighbors, a father and his 16 year-old son, about their state highpoints and peakbagging pursuits. I started packing some things in preparation for the day, then set off to camp 2 with not much besides a shovel and some water in my backpack.
In 3.5 hours, I skinned up to camp 2, dug out my cache (duffel and sled), and bombed back down to camp 1 with the empty sled flailing wildy behind me as I straightlined it down Ski Hill. I broke down camp and distributed everything in my backpack and duffel.
The slope of the glacier is pretty mild from here down. I was able to skate/pole most of the way, but had to put skins on below 7000 ft.
I was happy to find the wand marking my CMC and started digging. But it wasn’t there. What the f%ck?! I popped out my avalanche probe and started probing the area all around the cache, in a fine search pattern. I wasn’t hitting a damn thing. Ten minutes go by and I start getting worried. I thought this would be a piece of cake to dig up and continue to the airstrip to fly off the glacier. But this delay might cause me to miss a good flight window and have to spend another night on the glacier. And a lost CMC is $150. It was 6 PM and the air services will fly until 8 PM. I gave myself until 630 to find it.
I kept probing and getting frustrated. No way did anyone move it, the snow didn’t look like anyone dug it up or moved my cache marker, and no way did the thing get buried under more snow or melt its way further down. I started probing further from the marker in all directions, but still, nothing. It was hot and the sun was roasting me. At 630 I stepped back and slammed the probe in one last time. THUNK! rang out a foot below the surface. Ahhh, another relief. I quickly dug up the CMC, clipped it to the sled, and began the mile hillclimb to the airstrip, charging at a fast pace to try to get there in time for a flight off.
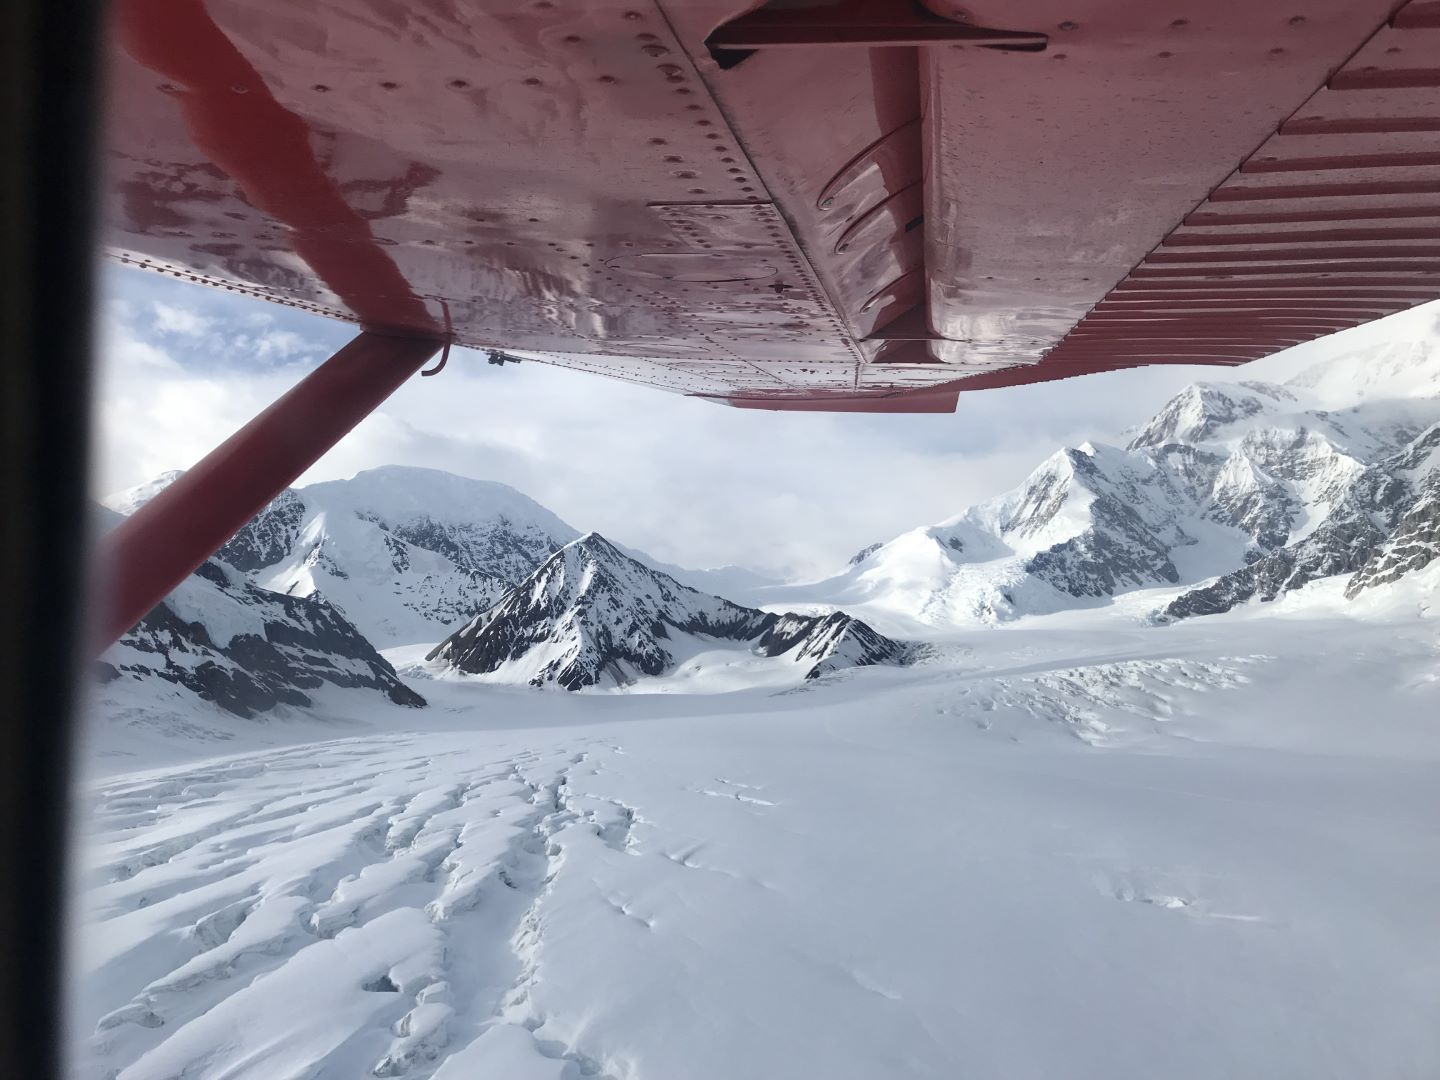
As soon as I could see the tent city, I yelled “Sheldon!” and the basecamp manager waved. Two climbers were there waiting for a flight, and one was en route. I wasn’t guaranteed a seat, as they weren’t sure what plane was flying in or how much weight it could hold. A small Cessna showed up and the pilot thought we could get everyone on, but a bag or two might have to stay overnight. We crammed in and had to leave one of the other climber’s bags overnight. No big deal for him. We flew over the Little Switzerland area and the pilot pointed out all sorts of neat climbs and peaks around the area. Back in Talkeetna, I got some triple antibiotic ointment to put on my burnt face and ate an entire large pizza.
Panorama of the trail passing camp 1, looking south-west-north
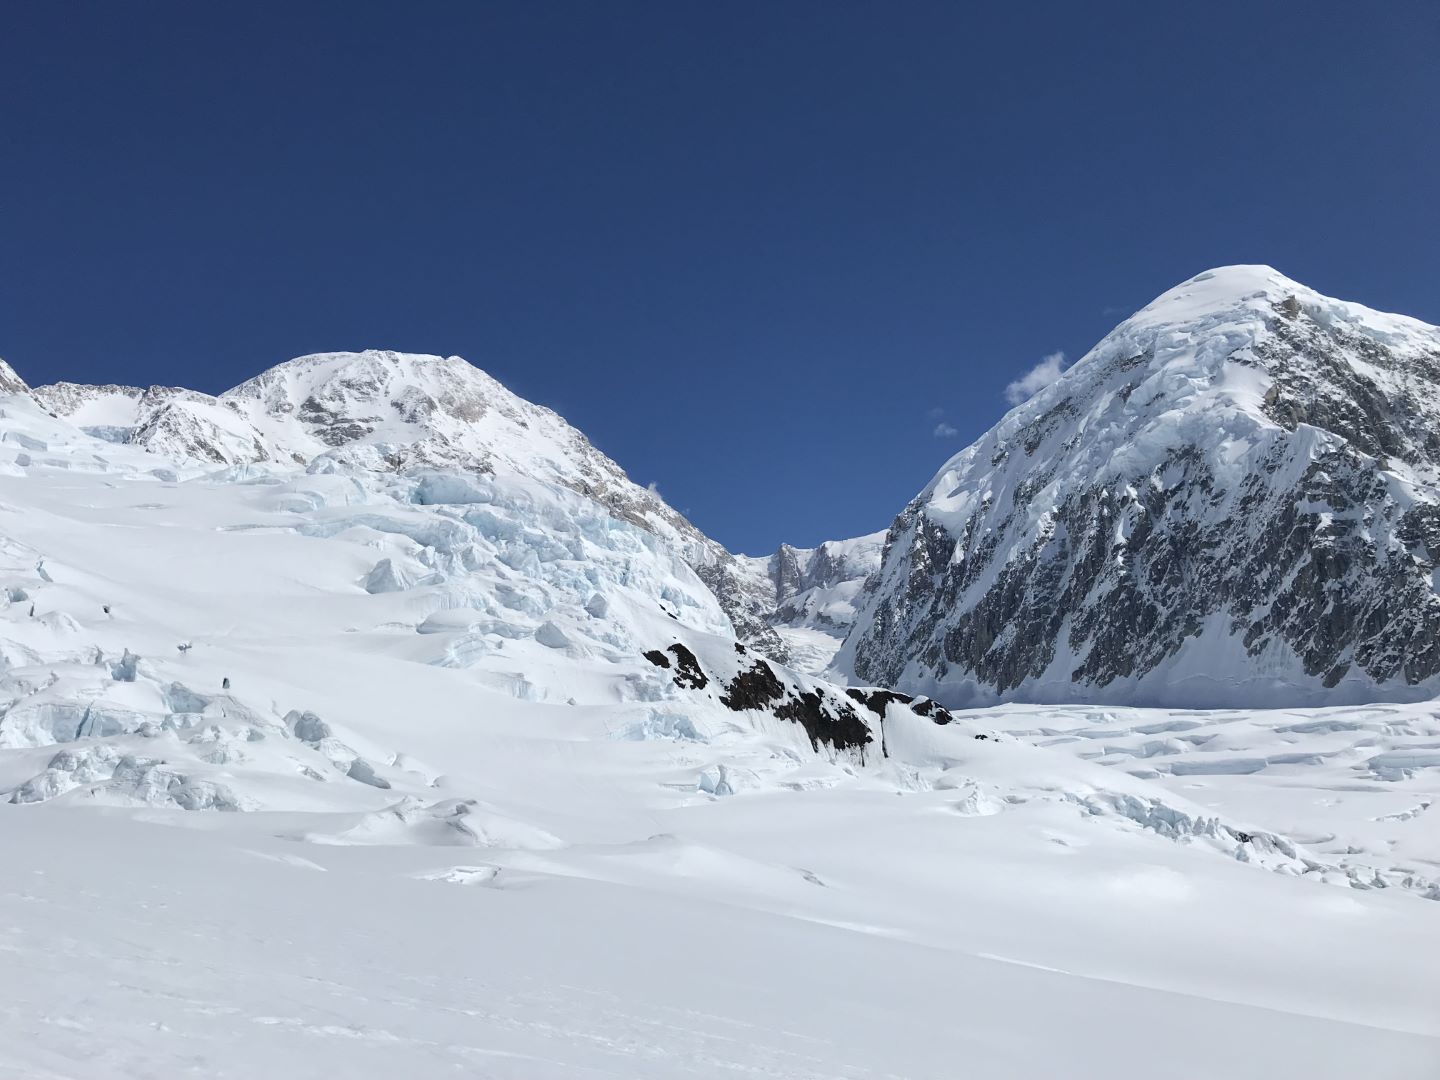
Looking up the Northeast Fork of the Kahiltna glacier, Denali on left and Kahiltna Peaks on right
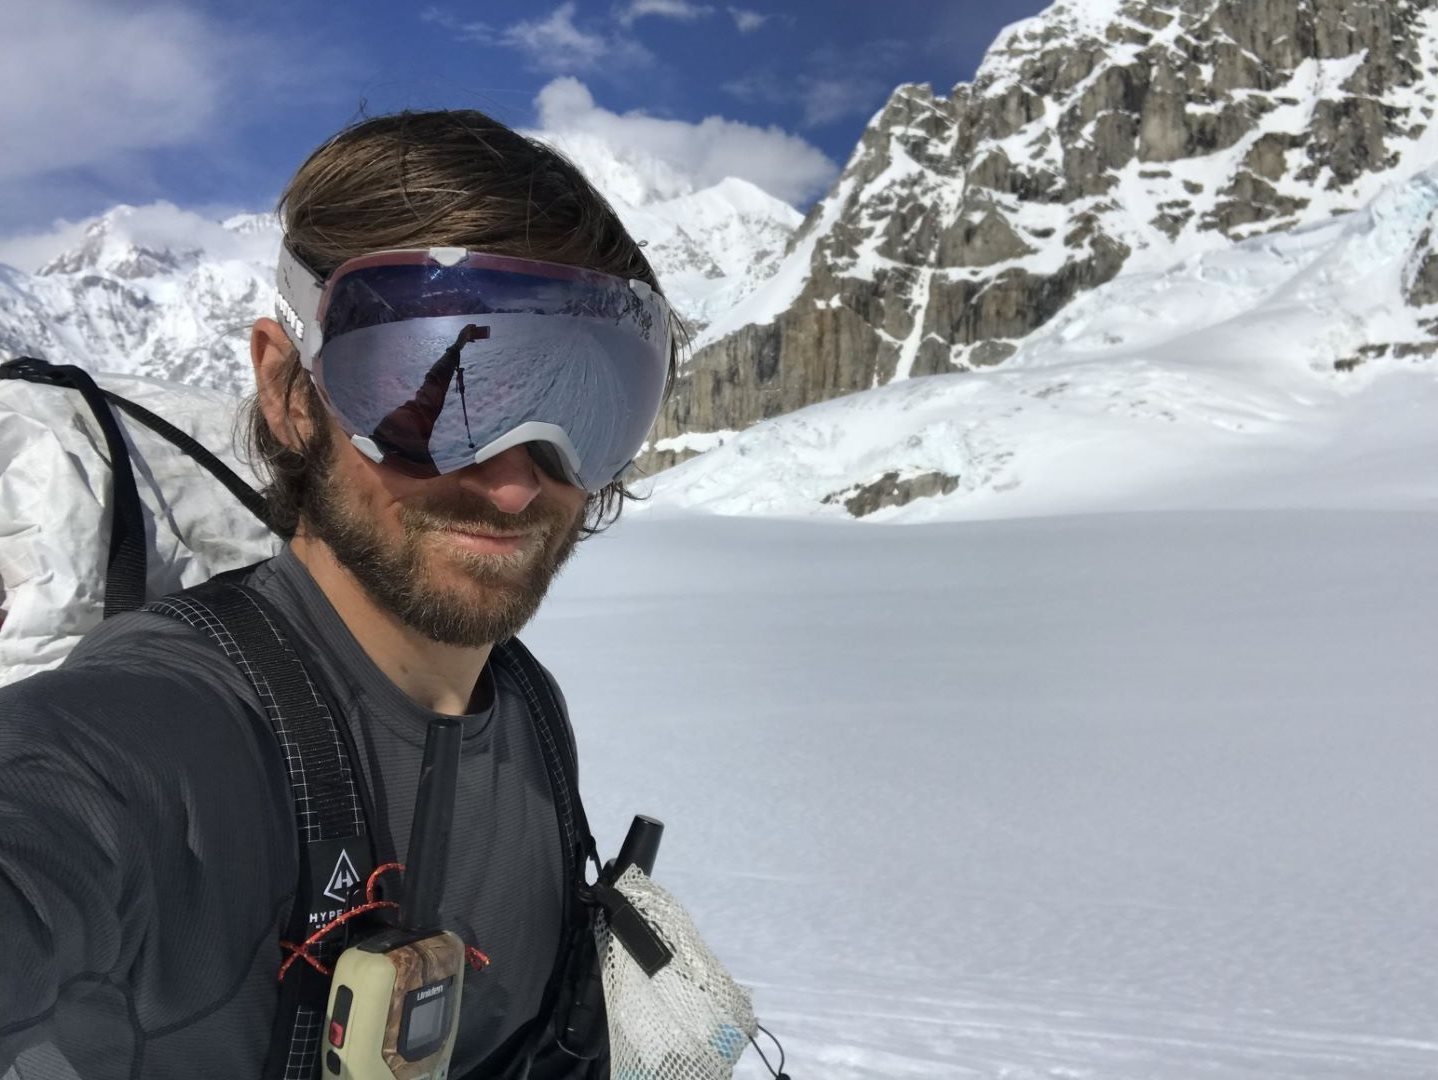
On my way back to the airstrip
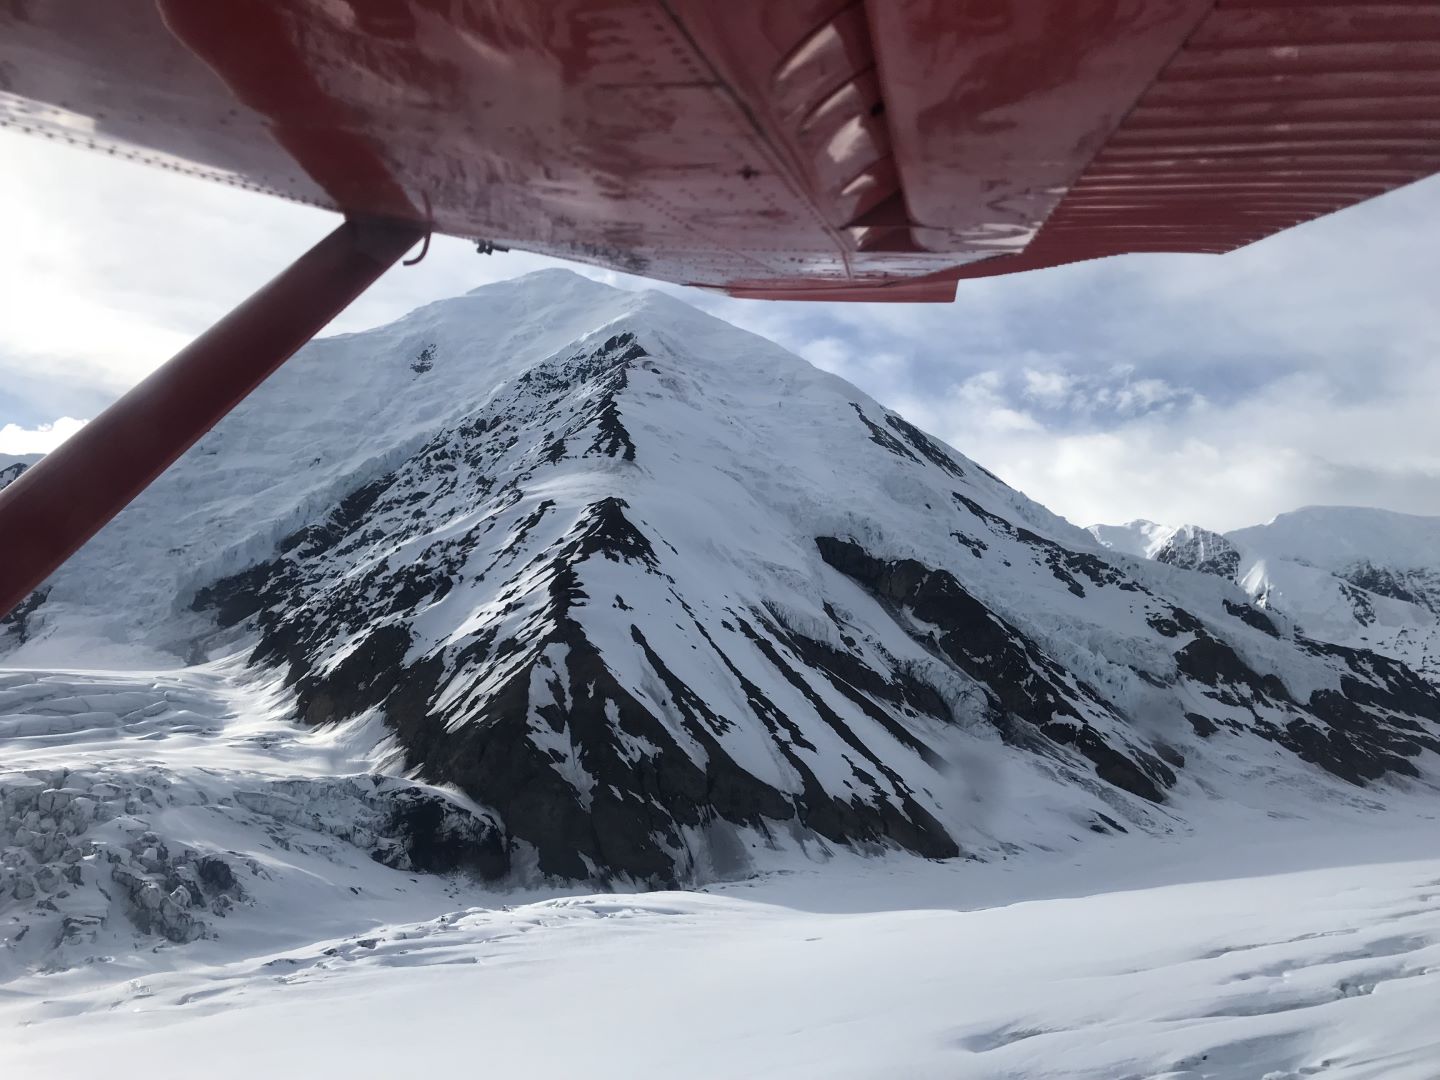
Flight out
Mt Crosson
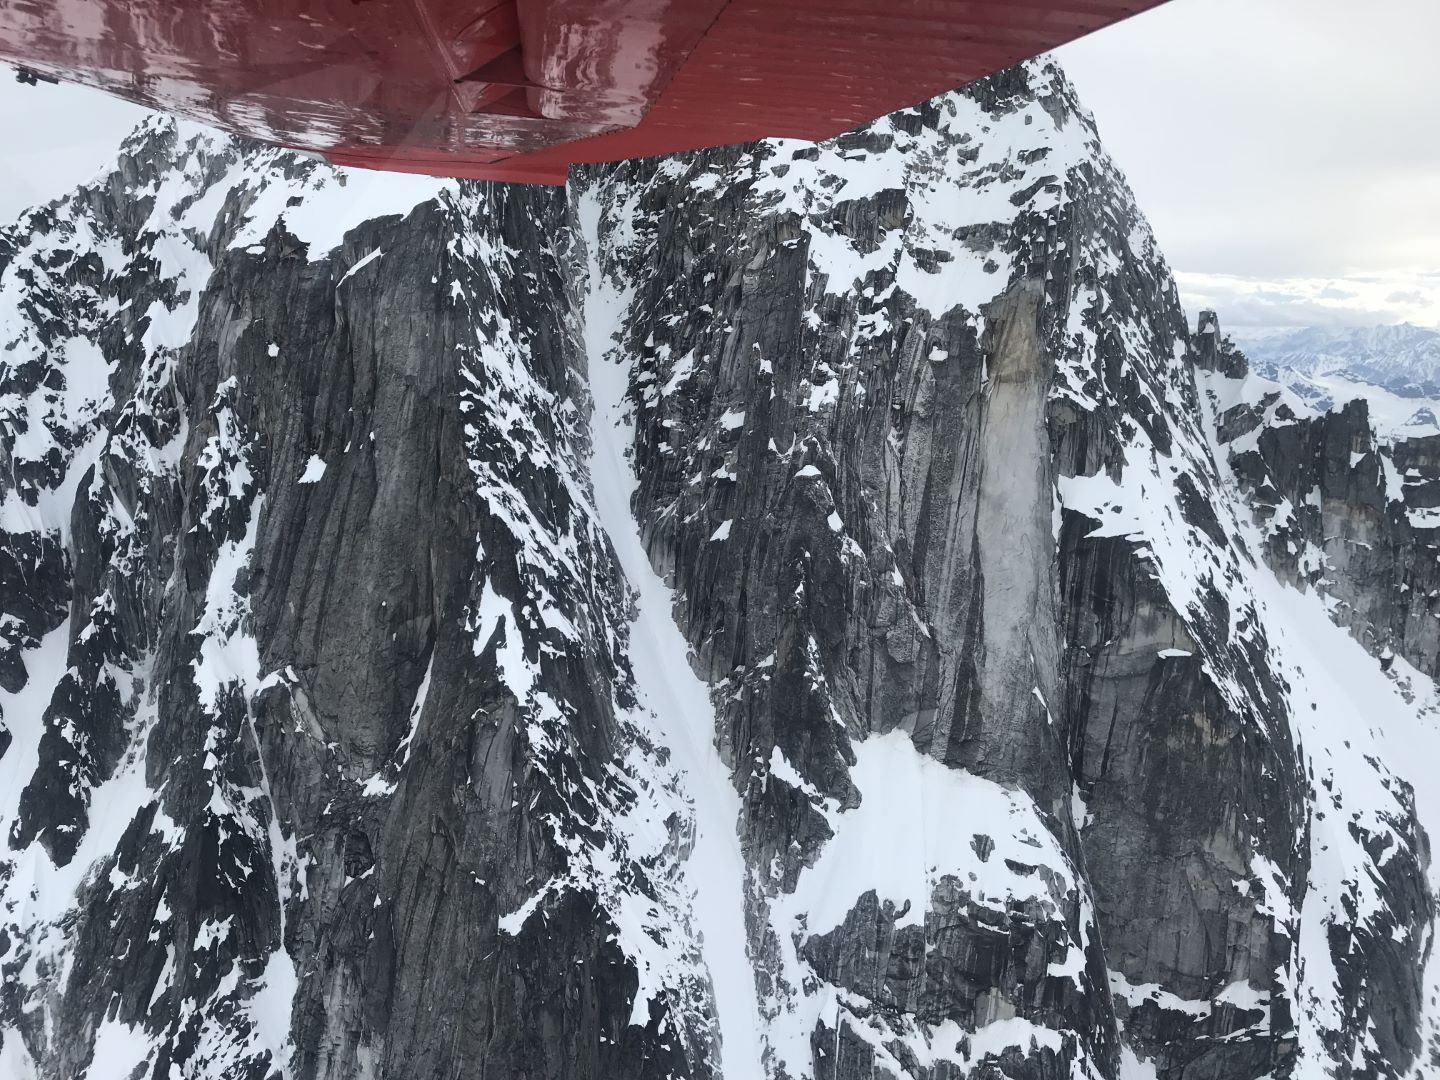
Yes please
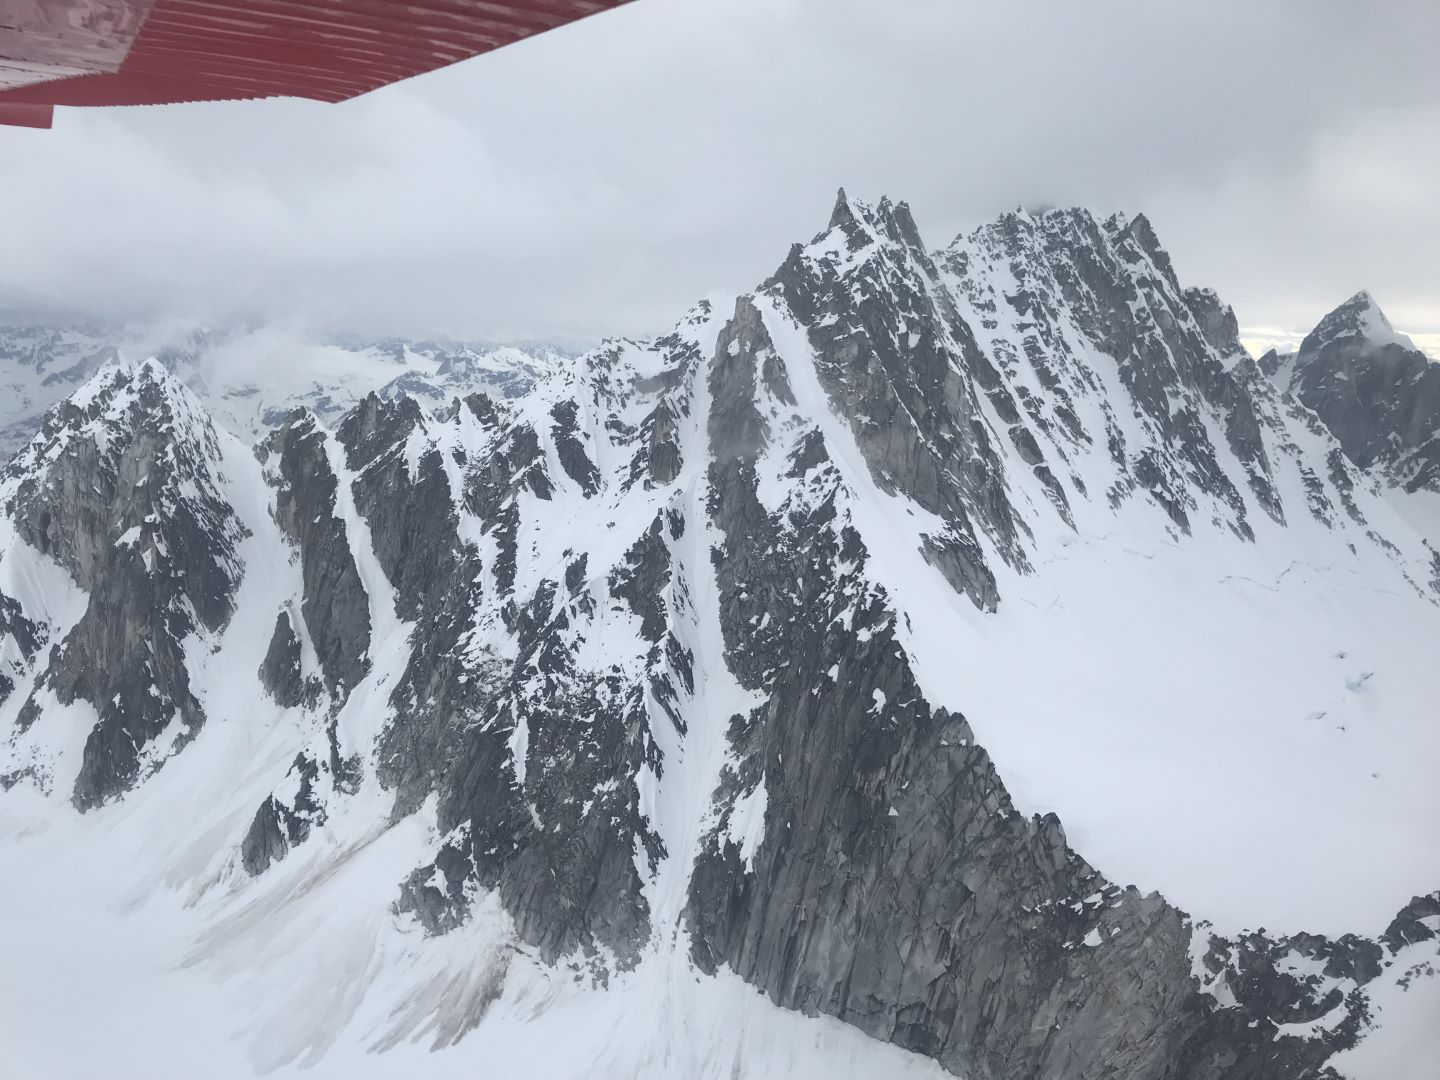
More yes
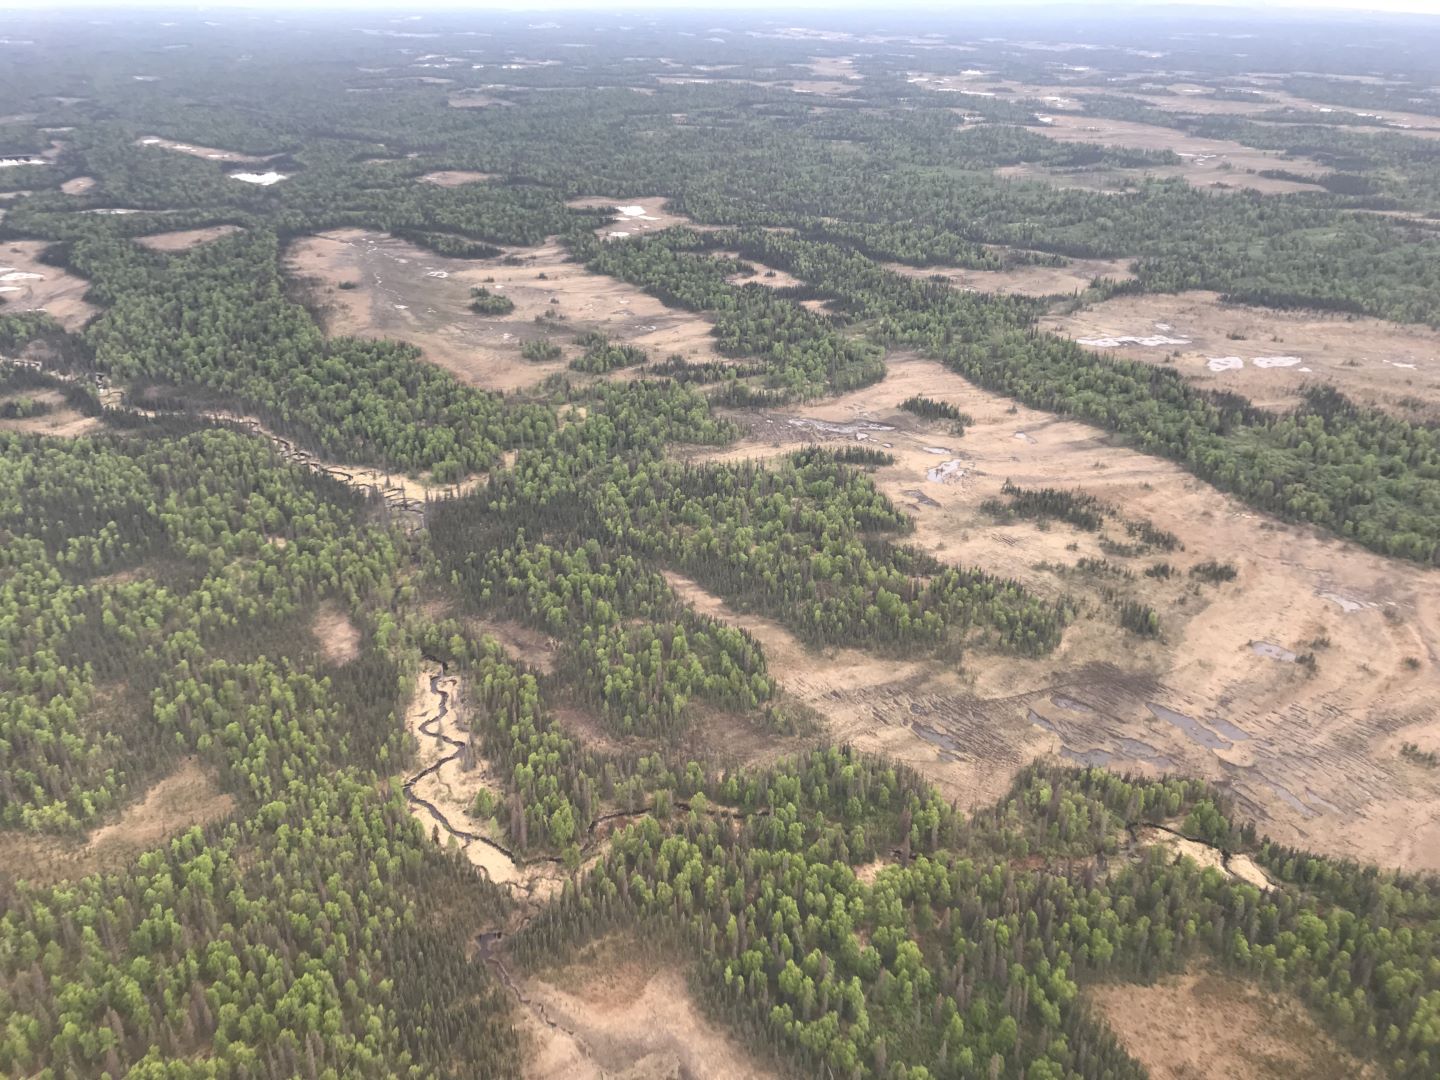
Green
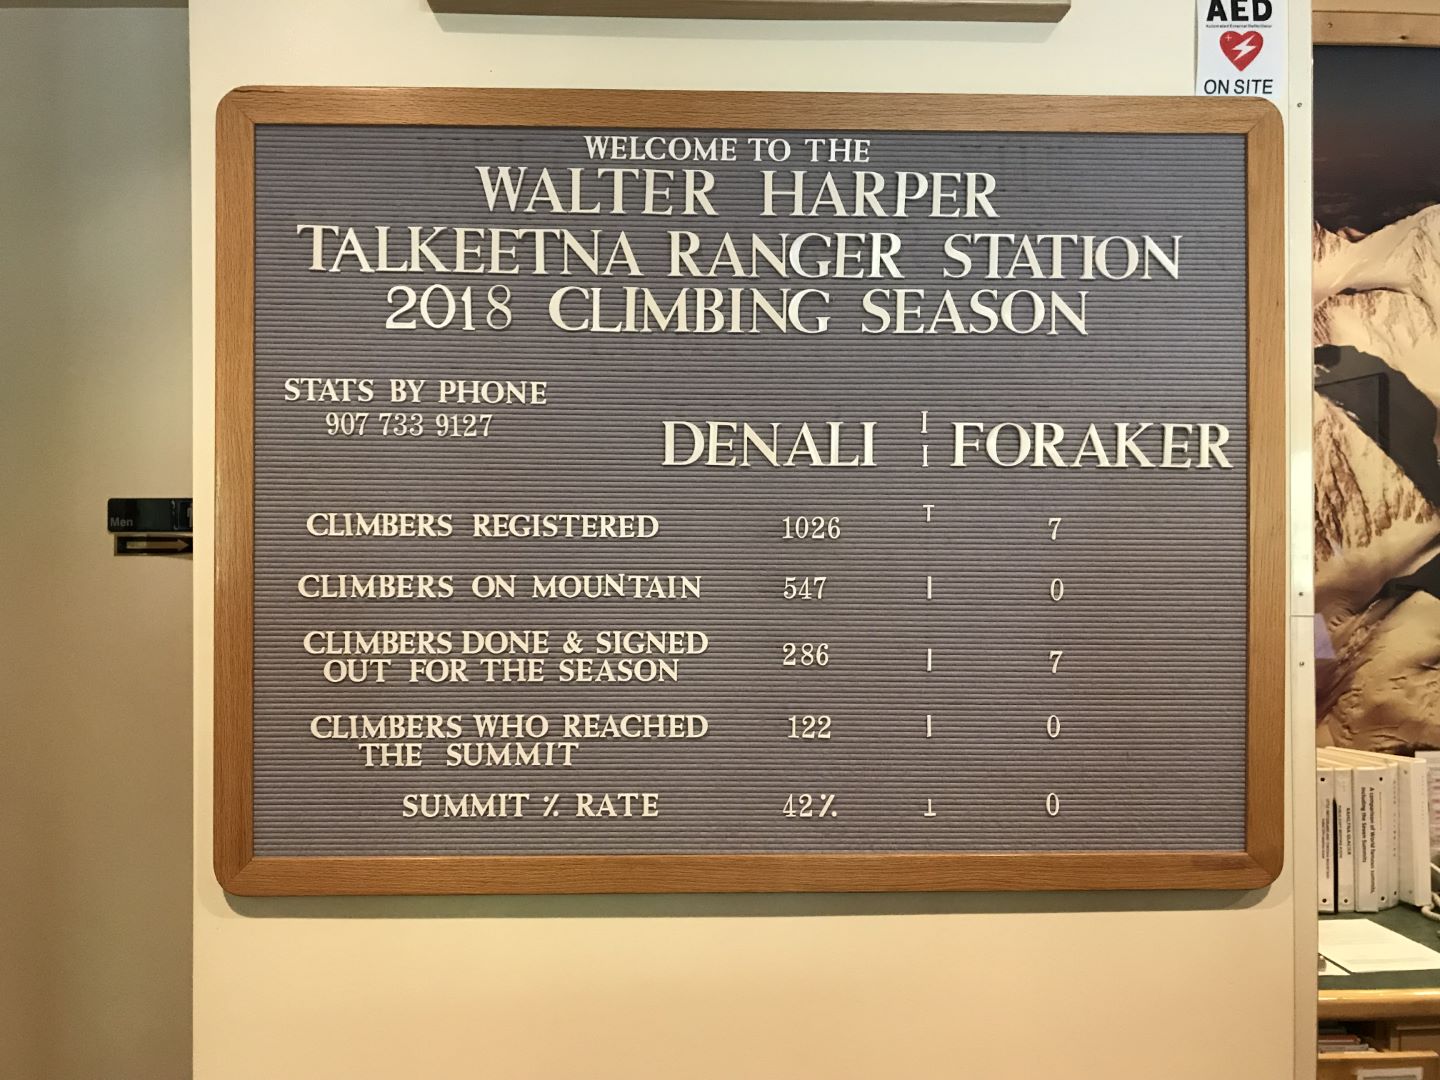
I’m the last one on Foraker
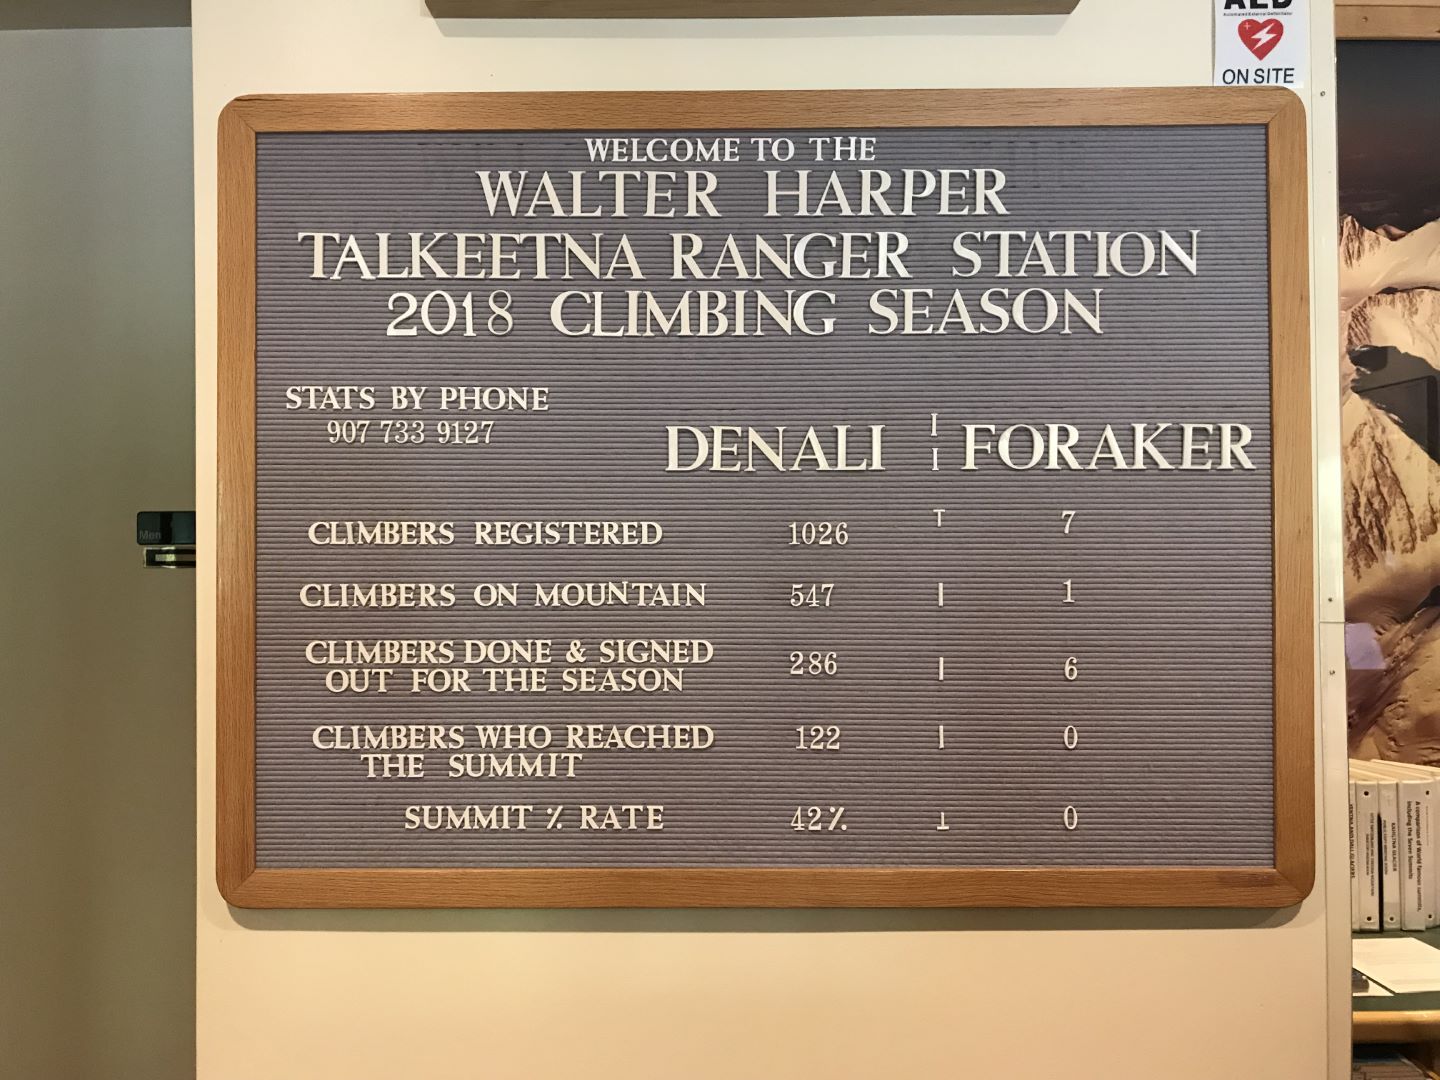
All clear on Foraker
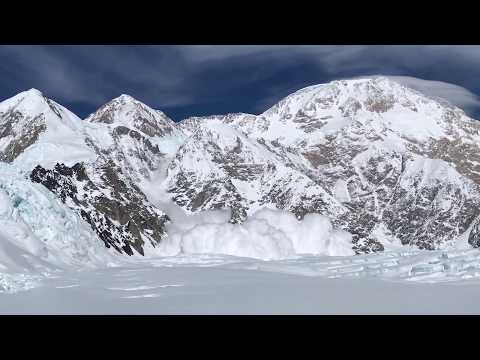
Huge serac fall avalanche coming down from near Windy Corner into the NE Fork (Valley of Death), youtube link: